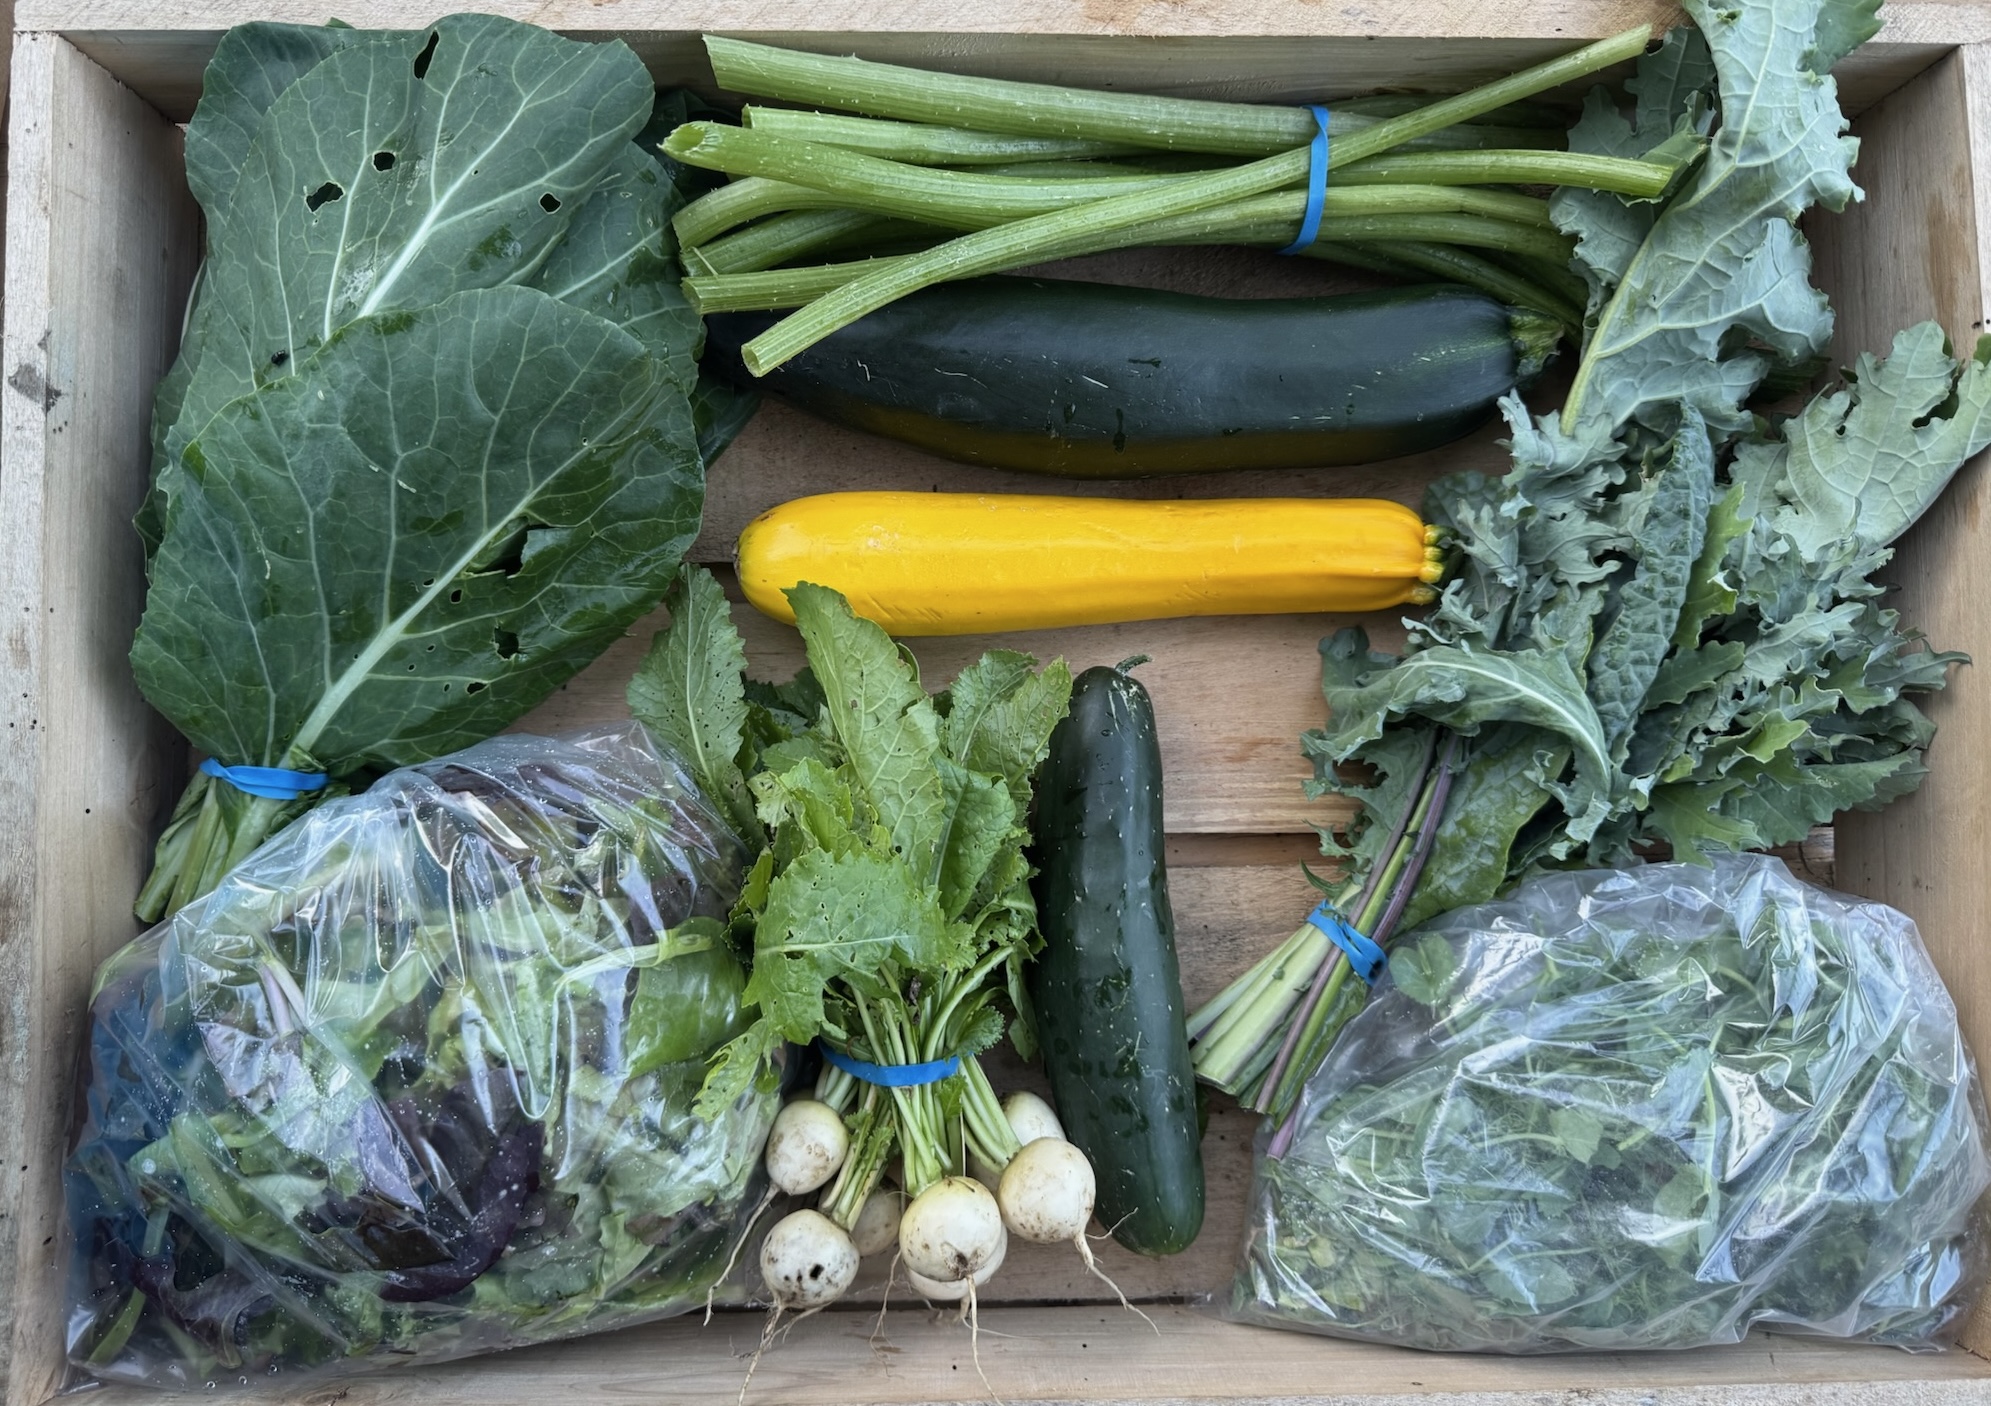
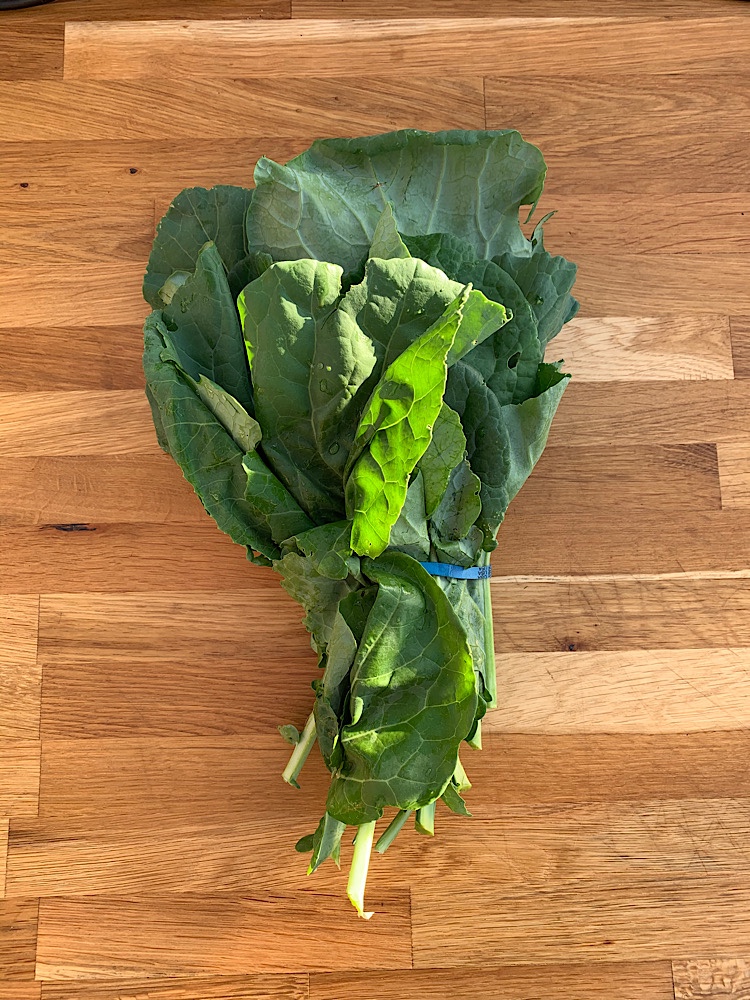
Collard Greens: Nutrient-dense and hearty, collard greens boast a robust flavor that stands up well to braising and sautéing.
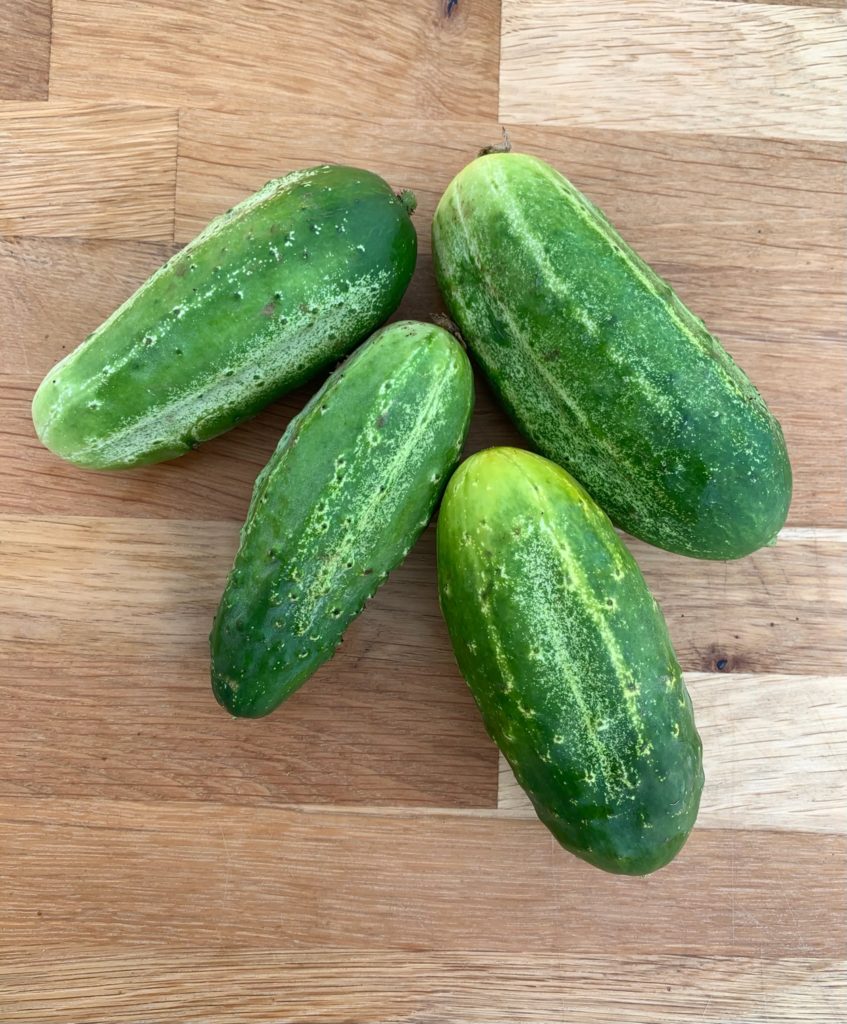
Cucumbers: Crisp and refreshing with a subtle sweetness. Perfect sliced into salads, tucked into sandwiches, or quick-pickled.
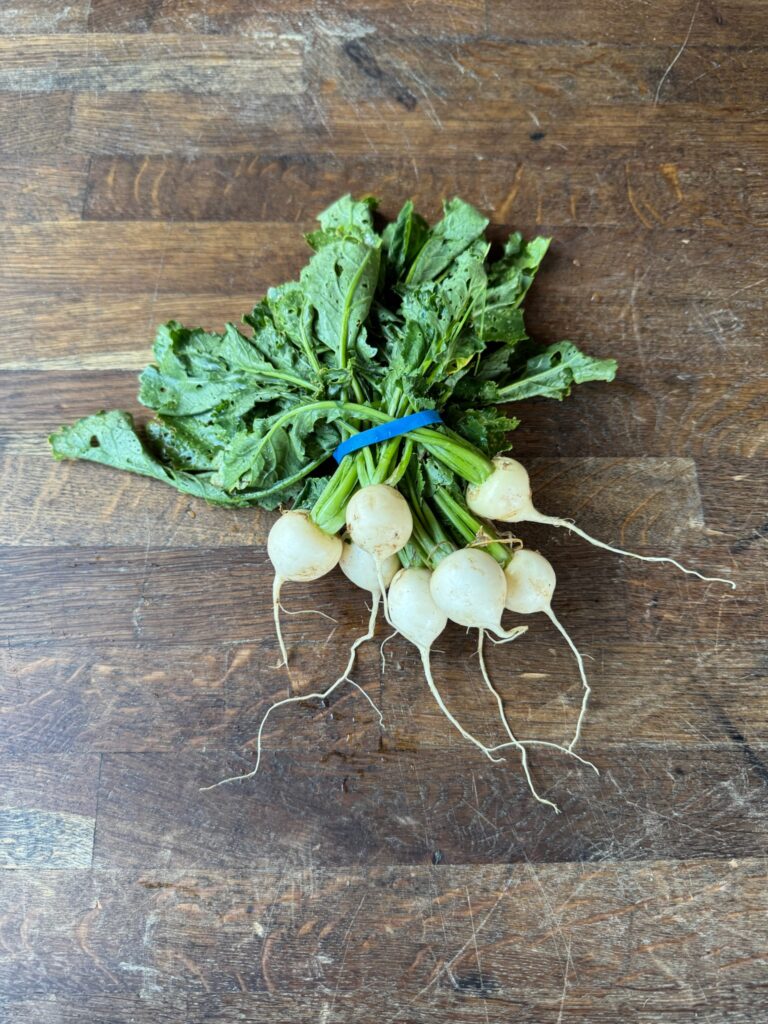
Hakurei Turnips: Crisp and slightly peppery when raw, turnips become sweet and mellow when roasted or cooked.
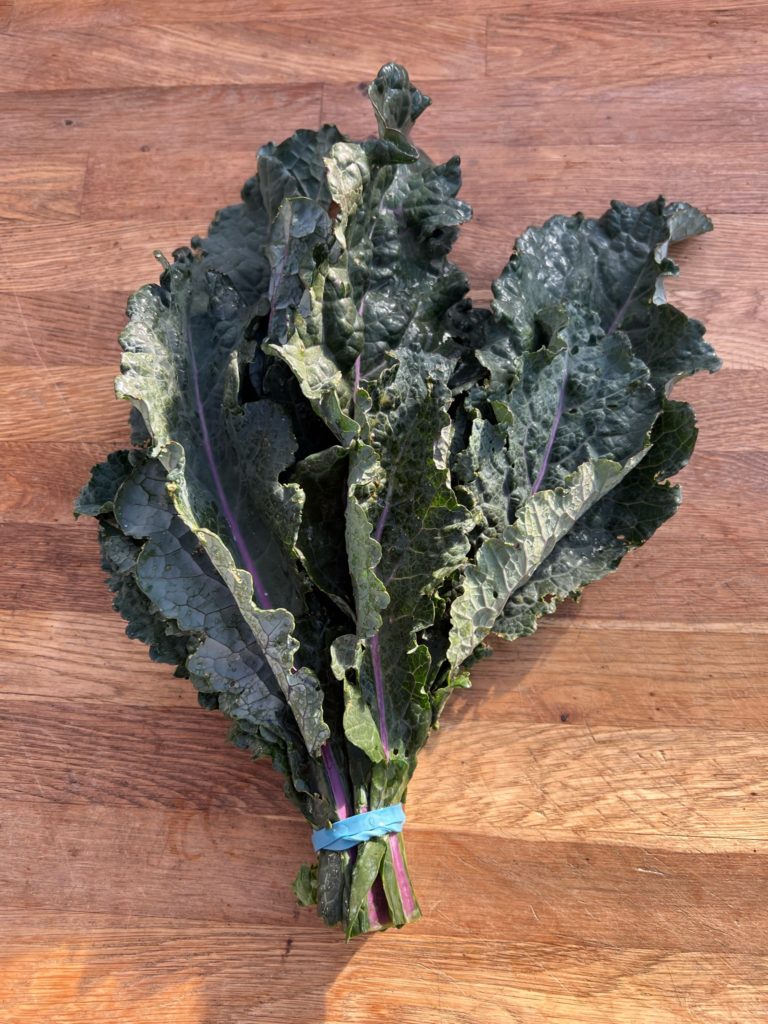
Kale Mix: A mix of sweet, tender young leaves with a slightly earthy taste. Use raw in salads, wilted into grains or pasta, or tossed into a soup at the end.
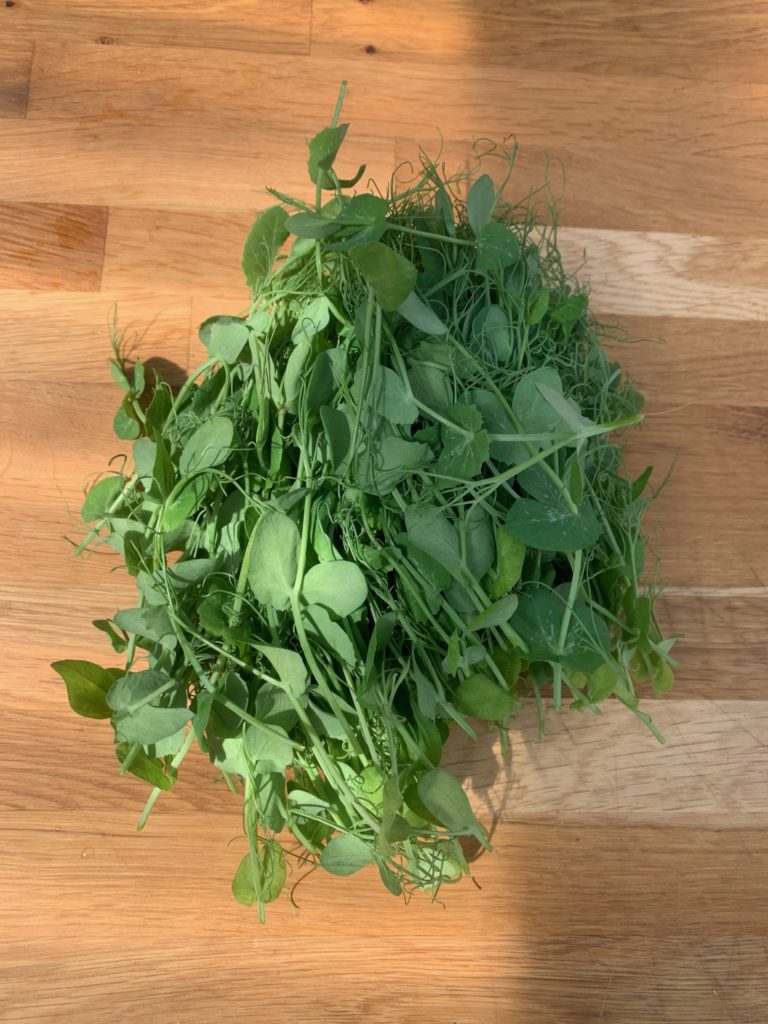
Pea Tendrils: Delicate and tender, pea tendrils offer a fresh, mildly sweet flavor reminiscent of young peas.
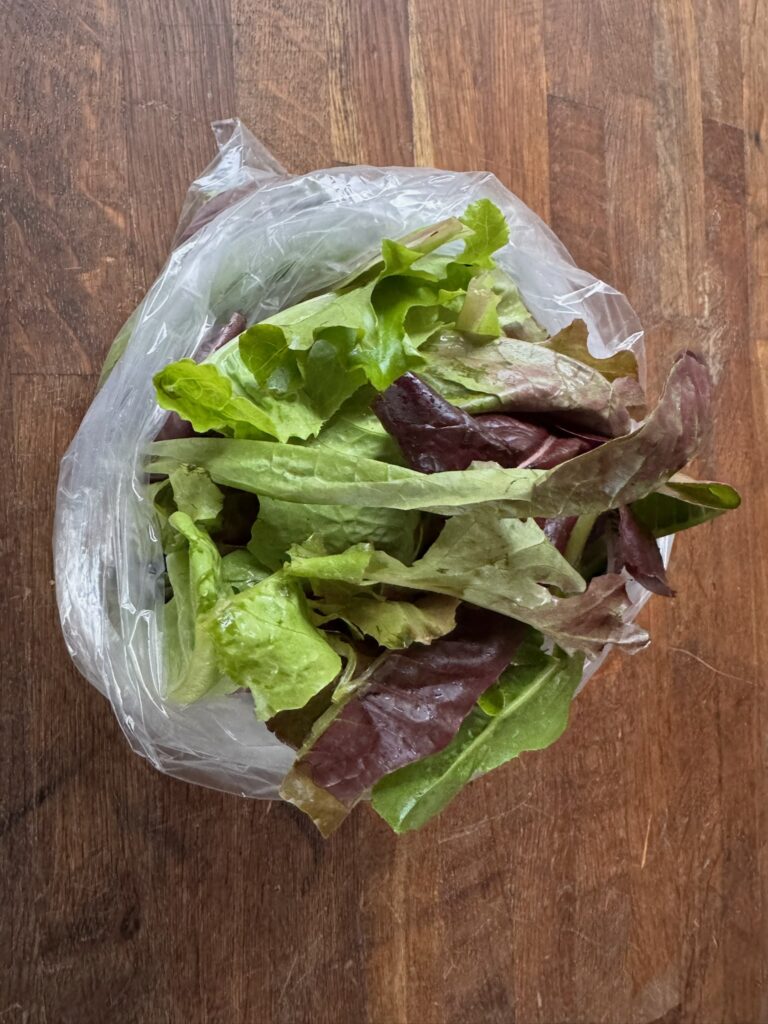
Salad Mix: Mild, tender, and refreshing. Use as a base for fresh salads, tossed with vinaigrette or piled onto sandwiches and wraps.
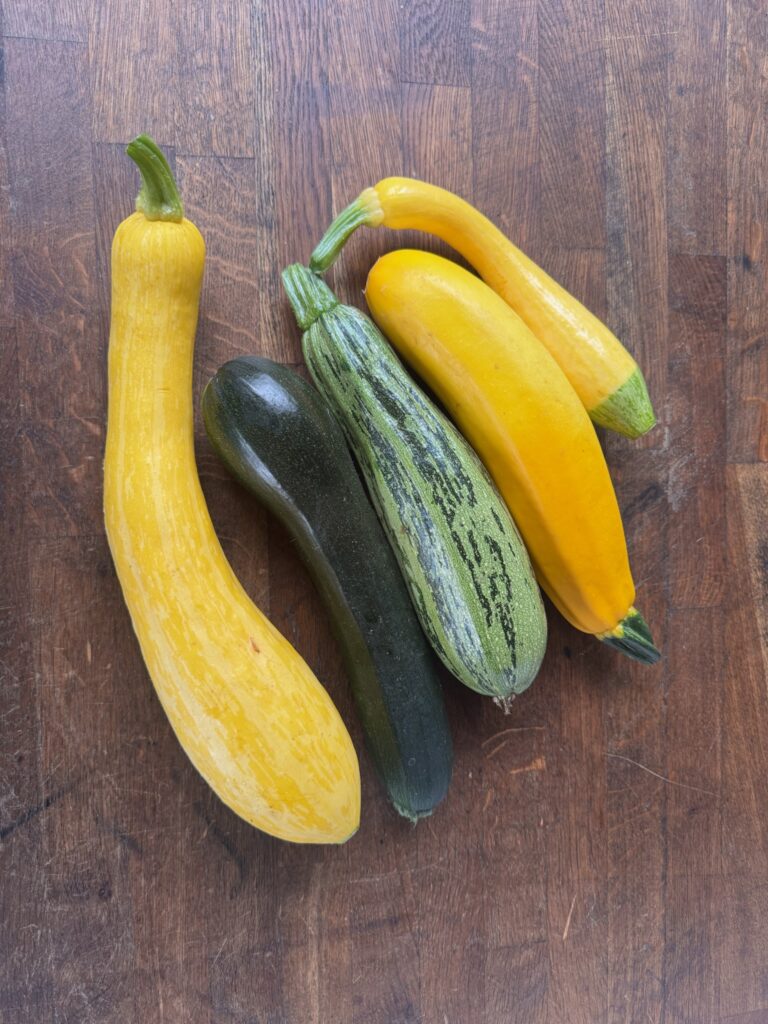
Summer Squash: Sweet and tender, can be grilled, roasted, or sautéed.
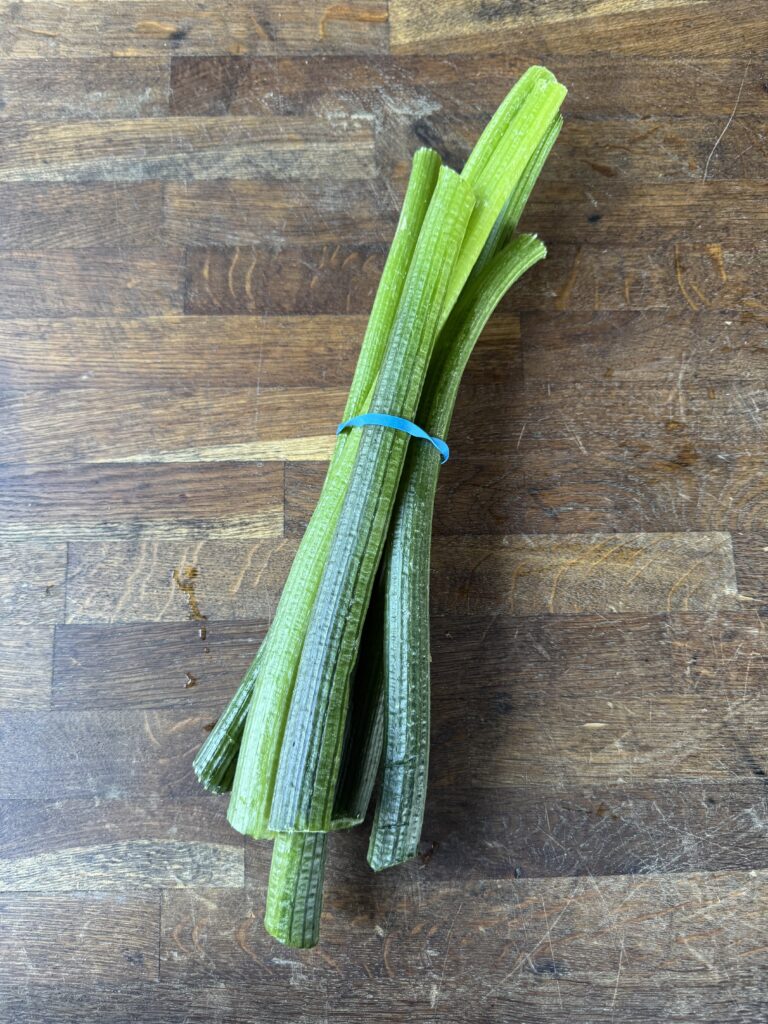
Squash Stems: Mild and green-tasting with a tender bite when cooked. Best sautéed, stir-fried, or simmered in soups. Remove tough fibers first.
A note from Chris
This Week on the Farm: Tomato Drama & Chicken Shenanigans
The tomatoes have officially lost all sense of discipline. We’re doing our best to tame the jungle, pruning, tying, pleading, but they’re mostly green and stubborn. We usually have ripe ones by July 4th, but apparently this year they’re observing their own calendar.
The weeds are still in charge of the garden, but the garden tractor is back in action, hallelujah! So we’re slowly regaining control. Keyword: slowly.
Even with the tractor, my knees are sore from many hours of crawling around pulling weeds trying to find the things I’ve planted.
Meanwhile, the chickens have launched a full-scale rebellion against their nesting boxes and are now laying eggs in literally every possible location except where they’re supposed to. We’ve been mowing their pasture just to uncover their secret stash spots. It’s like Easter every day, but with more feathers and clucking.
Big news: earlier this year, we got a greens harvester! Think mini handheld combine for greens. We’re trying out lettuce mix this year, and this week is the first harvest. Hopefully, you enjoy it.
Also, we’ve officially started at the Astoria Sunday Market! If you’re out at the coast, swing by and say hi.
And finally, in zucchini news: I think I’ve finally gotten ahead of the giant zucchinis. But we all know how that goes… stay tuned for next week’s update: “Revenge of the Squash.”
As always, thank you for being on this wild growing adventure with us. We’re so grateful for your support, weeds and all.
Collard Greens
Collards are in the same family as cabbage, broccoli and cauliflower. A bitter green.
Prep
Rinse. Eat raw or cooked. Stems take longer to cook. I like to remove them and cook longer than leaves.
How to use:
Sautéed Collard Greens: Heat a tablespoon of oil in a large skillet over medium heat. Add chopped onions and minced garlic and sauté for a minute. Then add chopped collard greens, a pinch of salt, and some red pepper flakes (optional). Cook until the collard greens are tender, stirring occasionally.
Collard Green Wraps: Use collard greens as a substitute for tortillas or bread in wraps. Fill with your favorite veggies, protein, and sauce for a healthy and flavorful meal.
Collard Green Chips: Preheat the oven to 350°F. Remove the stems from collard greens and tear them into large pieces. Toss the leaves with a little oil and salt. Spread the leaves in a single layer on a baking sheet and bake for 10-15 minutes, or until crispy.
Collard Green Pesto: Combine blanched collard greens, garlic, olive oil, Parmesan cheese, and nuts (such as almonds or pine nuts) in a food processor. Pulse until the mixture forms a smooth paste. Serve with pasta or as a dip.
Collard Green Salad: Thinly slice raw collard greens and toss with a citrus-based dressing, sliced almonds, and dried fruit (such as cranberries or raisins). Add crumbled feta cheese or goat cheese for extra flavor.
Collard Green Soup: Cook chopped onions and garlic in a large pot until softened. Add chopped collard greens, chicken or vegetable broth, and a can of diced tomatoes. Season with salt and pepper to taste. Simmer until the collard greens are tender and the flavors are blended. Serve with crusty bread.
Cucumbers are a crisp and refreshing vegetable with a mild, subtly sweet flavor. They have a high water content, which gives them a hydrating and cooling quality. The flesh of cucumbers is pale green and juicy, with a crisp texture. They are commonly enjoyed fresh in salads, sandwiches, and wraps, or sliced as a refreshing snack.
Storing
Please refrigerate.
Prep
Rinse. Eat raw or cooked.
Preserving
Pickling: To make refrigerator pickled cucumbers, start by washing and thinly slicing the cucumbers. Place the cucumber slices in a clean, sterilized jar or container. In a separate bowl, combine equal parts of water and vinegar (such as white vinegar or apple cider vinegar) along with salt and sugar to taste. Stir until the salt and sugar dissolve completely. You can also add spices like dill, garlic, mustard seeds, or red pepper flakes for extra flavor. Pour the vinegar mixture over the cucumber slices, making sure they are fully submerged. Place a lid or cover on the jar and refrigerate for at least 24 hours to allow the flavors to develop. The pickled cucumbers will keep well in the refrigerator for up to a few weeks, and they can be enjoyed as a tangy and refreshing snack or used as a topping for sandwiches, salads, or tacos.
How to use
Fresh in salads: Cucumbers add a crisp and refreshing element to salads. Simply slice or dice them and toss them with other vegetables, greens, and your favorite dressing.
Cool and refreshing snack: Slice them into rounds or sticks and enjoy them plain or with a dip like hummus or tzatziki.
Cucumber sandwiches: Make a classic cucumber sandwich by layering thin cucumber slices on bread spread with cream cheese or butter. Add a sprinkle of salt and pepper for extra flavor.
Gazpacho or cold soups: Blend cucumbers with other ingredients like tomatoes, peppers, and herbs to make a refreshing gazpacho or chilled cucumber soup.
Pickles: Turn cucumbers into pickles by soaking them in a brine solution with vinegar, water, salt, and spices. Allow them to marinate for a few days to develop the desired flavor. more info above.
Sushi rolls: Use cucumber slices as a filling in homemade sushi rolls for a crunchy texture and refreshing taste.
Cucumber water: Infuse water with cucumber slices for a refreshing and hydrating beverage. Add mint leaves or lemon slices for extra flavor.
Cucumber cocktails: Blend cucumber slices with your favorite fruits and herbs to make refreshing cocktails or mocktails.
Cucumber salsa: Dice cucumbers and mix them with tomatoes, onions, jalapeños, cilantro, and lime juice to create a flavorful salsa.
Cucumber noodles: Spiralize or julienne cucumbers to create "noodles" and use them as a base for salads or as a lighter alternative to pasta in dishes like cold sesame cucumber noodles.
Hakurei Turnips
Hakurei turnips, also known as baby salad turnips, are small, smooth, white turnips with tender skin and a sweet, crisp texture. Unlike larger, more pungent turnips, these can be enjoyed raw or cooked, and their mild flavor makes them a favorite in fresh salads, pickles, or lightly sautéed dishes. The leafy green tops are also edible and can be used like other leafy greens in sautés or soups.
Prep
Rinse. The whole turnip is edible, leaves and root. Eat raw or cooked. If the leaves start to wilt, you can revive them by soaking in ice water for a few minutes before patting them dry and using as desired.
Storing
Store the turnips and greens separately.
It's best to use leaves within a few days for optimal flavor. To store it, place unwashed leaves in a perforated plastic bag or a container lined with a dry paper towel to absorb excess moisture. Seal the bag or container loosely to allow for some airflow. Store the bag in the refrigerator's crisper drawer, where it will stay fresh for a few days.
Turnip roots can keep for months in the refrigerator.
Preserving
Freezing: Turnips can be blanched and frozen for long-term storage. Start by cutting the turnips into your desired shape (slices, cubes, or wedges). Blanch them in boiling water for a couple of minutes, then immediately transfer them to an ice bath to stop the cooking process. Drain and pat dry the turnips before packaging them in airtight freezer bags or containers. Label and date the packages, then store them in the freezer for up to 10 to 12 months.
Fermenting: Fermenting turnips creates a tangy and flavorful product. Grate the turnips, then place them in a clean jar. Prepare a brine solution by dissolving salt in water (approximately 2 tablespoons of salt per quart of water). Pour the brine over the grated turnips, ensuring they are completely submerged. Place a weight on top to keep the turnips submerged and cover the jar loosely with a lid. Allow the turnips to ferment at room temperature for a few days to a week, depending on your desired level of fermentation. Taste after a few days. Once fermented, secure the lid tightly and store the jar in the refrigerator.
Pickling: Turnips can be pickled to preserve their crispness and add a tangy flavor. Prepare a pickling brine by combining vinegar, water, salt, sugar, and your choice of spices. Bring the brine to a boil, then let it cool. Peel and slice the turnips, then pack them into sterilized jars. Pour the cooled brine over the turnips, ensuring they are fully submerged. Seal the jars with sterilized lids and store them in the refrigerator. Allow a few days for the flavors to develop before enjoying the pickled turnips.
How to use:
Raw in Salads: Slice or quarter baby salad turnips and toss them into green or grain salads for a sweet, crisp bite.
Pickled: Quick-pickle sliced turnips in vinegar, sugar, and salt for a tangy snack or topping.
Sautéed: Sauté whole or halved turnips in olive oil or butter until golden and tender. Add the greens near the end for a full use of the plant.
Roasted: Roast with other root vegetables for a caramelized, slightly sweet side dish.
Soups and Stir-Fries: Add chopped turnips and greens to soups or stir-fries for a light, earthy flavor and tender texture.
This a mix of Dazzling Blue, Red Russian and Scarlett kale.
Prep
Rinse. Eat raw or cooked. Stems take longer to cook. I like to remove them and cook longer than leaves.
How to use:
In salads: Kale is a sturdy green that holds up well in salads. Try massaging the kale with some olive oil and lemon juice to make it more tender.
In smoothies: Kale adds a nutritious boost to smoothies. Try blending kale with frozen fruit and yogurt for a delicious and healthy breakfast.
In soups: Kale is a great addition to soups. Add it to vegetable soup or use it in place of spinach in a classic Italian minestrone.
In stir-fries: Kale works well in stir-fries. Add it to your favorite stir-fry recipe along with other vegetables and a protein.
In pasta dishes: Kale can be added to pasta dishes for a nutritious twist. Try tossing it with spaghetti, olive oil, and garlic for a simple yet satisfying meal.
In sandwiches and wraps: Use kale leaves as a healthy alternative to lettuce in sandwiches and wraps. They add a crunchy texture and a boost of nutrition.
In pesto: Use kale instead of basil in a classic pesto recipe. It adds a unique flavor and packs in extra nutrients.
In chips: Bake kale leaves in the oven with a little olive oil and salt for a healthy and delicious snack.
Pea tendrils, also known as pea shoots or pea sprouts, are young and tender tendrils that grow from the tops of pea plants. They are delicate, leafy greens with thin, curly stems and small, bright green leaves. The taste of pea tendrils is often described as mild and slightly sweet, with a subtle hint of the distinct flavor found in mature peas. The texture is tender and crisp, providing a pleasant crunch.
Prep
Rinse. The whole tendril is edible. Sometimes the stems get a little woody at the ends and can be removed. Eat raw or cooked.
Storing
It's best to use it within a few days for optimal flavor. To store it, place unwashed leaves in a perforated plastic bag or a container lined with a dry paper towel to absorb excess moisture. Seal the bag or container loosely to allow for some airflow. Store the bag in the refrigerator's crisper drawer, where it will stay fresh for a few days.
How to use:
Salads: Add pea tendrils to your favorite salad greens for an extra layer of texture and flavor.
Stir-fries: Toss pea tendrils into stir-fries towards the end of cooking. Their tender texture and subtle flavor make them a perfect addition to stir-fried vegetables, meats, or noodles.
Sandwiches and Wraps: Layer pea tendrils in sandwiches or wraps to add a crisp and refreshing bite. They can provide a light and delicate crunch, along with a touch of sweetness.
Soups and Stews: Add pea tendrils to hot soups or stews just before serving. They will wilt slightly, adding a pop of green color and a burst of freshness to the dish.
Pasta Dishes: Mix cooked pea tendrils into pasta dishes like spaghetti or fettuccine. The tendrils will add a delicate and vibrant element to the pasta, complementing the other ingredients.
Pesto or Sauce: Blend pea tendrils with garlic, nuts, cheese, and olive oil to make a flavorful pesto or sauce. Use it as a spread, dip, or toss it with cooked pasta for a quick and vibrant meal.
Side Dish: Sauté pea tendrils with garlic and olive oil for a simple and nutritious side dish. The gentle cooking will help retain their delicate flavor and texture.
A fresh mix of baby greens, young lettuces. Each bite brings a balance of tender texture and varied flavors, mild, peppery, slightly sweet, or nutty depending on the blend. Great as a base or garnish, it is a quick way to add color and freshness to any meal.
Prep
These greens are not pre-washed and should always be washed before using. Chop or add whole leaves. Eat raw or cooked. If the lettuce starts to wilt, you can revive it by soaking the leaves in ice water for a few minutes before patting them dry and using as desired.
Storing
It's best to use it within a few days for optimal flavor. To store it, place unwashed leaves in a bag or a container lined with a dry paper towel to absorb excess moisture. Seal the bag or container loosely to allow for some airflow. Store the bag in the refrigerator's crisper drawer, where it will stay fresh for a few days.
How to use:
Salads: Lettuce is a staple ingredient in salads. Use it as a base and layer on other vegetables, fruits, proteins, and dressings to create a refreshing salad.
Burgers and Sandwiches: Add a crisp lettuce leaf to your burgers or sandwiches to provide a crunchy and fresh element. It adds texture and helps balance out the flavors.
Soups and Stews: Add shredded lettuce to hot soups or stews just before serving. The lettuce will wilt slightly and add a refreshing touch to the warm dish.
Stir-fries: Toss lettuce leaves into stir-fries at the last minute, allowing them to wilt slightly but still maintain some crispness. They add a fresh and vibrant element to the dish.
Smoothies: Yes, you can even add lettuce to your smoothies!
Summer squash refers to a variety of tender, edible gourds that are harvested during the summer months. They typically have a vibrant, yellow or green skin and a mild, slightly sweet flavor. Summer squash comes in various shapes, including elongated, cylindrical zucchini and round or bulbous varieties like pattypan and yellow crookneck squash. The flesh is tender and succulent, with a delicate texture that holds up well in both raw and cooked preparations.
Prep
Rinse. Eat raw or cooked.
Storing
Handle gently. The skin is thin and fragile. Keep on the counter and use within a week. If you aren't going to use them right away keep in the refrigerator.
Preserving
Freezing: Wash and slice the squash into desired shapes, such as rounds or cubes. Blanch the slices in boiling water for a couple of minutes, then quickly transfer them to an ice bath to cool. Drain well and pat dry. Arrange the slices in a single layer on a baking sheet and freeze until firm. Transfer the frozen slices to airtight freezer bags or containers, removing as much air as possible. Label and date the packages, then store them in the freezer for up to 8-10 months.
Dehydrating: Slice the squash into thin rounds or strips. Arrange the slices on dehydrator trays or a baking sheet lined with parchment paper. Set the dehydrator to the appropriate temperature for vegetables or use the oven on its lowest setting. Dry the slices until they are crisp and brittle. Store the dehydrated squash in airtight containers or resealable bags. Rehydrate the slices in water or broth before using them in recipes.
How to use:
Grilling: Slice the squash into thick rounds or lengthwise strips and brush them with olive oil and seasonings. Grill them over medium heat until tender and slightly charred.
Sautéing: Cut the squash into bite-sized pieces or slices and sauté them in a little olive oil or butter until they are golden brown and tender. You can add herbs, garlic, or other seasonings for extra flavor. Sautéed summer squash can be enjoyed as a side dish, added to pasta, or used as a topping for pizzas.
Roasting: Toss sliced summer squash with olive oil, salt, and pepper, then spread them in a single layer on a baking sheet. Roast in a preheated oven at around 425°F (220°C) for 15-20 minutes or until they are tender and caramelized. Roasted summer squash is a tasty addition to grain bowls, salads, or as a side dish.
Raw in salads: Thinly slice or julienne summer squash and add it to salads for a fresh and crisp texture.
Stuffed squash: Hollow out larger summer squash varieties like zucchini or pattypan and fill them with a stuffing of your choice, such as cooked grains, cheese, herbs, or ground meat. Bake until the squash is tender and the filling is cooked through.
Soups and stews: Add sliced or cubed summer squash to soups, stews, or chili for added flavor and texture. It cooks relatively quickly and absorbs the flavors of the other ingredients.
Spiralized: use a spiralizer to make squash noodles. You can simply sauté the squash noodles in a bit of olive oil or butter until they are tender but still retain some crunch. Top them with your favorite pasta sauce, such as marinara, pesto, or alfredo, and garnish with grated cheese, fresh herbs, or toasted nuts. You can also use spiralized summer squash in salads, stir-fries, or cold noodle dishes.
Sauce base: Summer squash can be used to create a delicious and creamy sauce that pairs well with pasta, grains, or roasted vegetables. Start by slicing the summer squash into small cubes or rounds. Steam or sauté until it becomes tender. Transfer the cooked squash to a blender or food processor and blend it until smooth. Add a splash of broth or dairy of choice, a squeeze of lemon juice, and season with salt, pepper, and herbs like basil or thyme to enhance the flavor. You can also incorporate garlic, onion, or Parmesan cheese for additional depth. Adjust the consistency by adding more broth if needed. Toss the sauce with cooked pasta or drizzle it over roasted vegetables.
Squash stems are the hollow stalks of the squash plant, often overlooked but entirely edible when properly prepared. They have a mild, slightly sweet flavor and a tender-crisp texture when cooked. The outer layer can sometimes be fibrous or spiny, so peeling or scraping it away is recommended before cooking. Once prepped, squash stems can be a flavorful addition to stir-fries, soups, or sautés, especially when paired with bold ingredients like garlic, onions, tomatoes, or coconut milk. Their sturdy structure holds up well in both quick and slow cooking methods, making them a versatile way to use more of the squash plant.
Prep
Rinse squash stems thoroughly to remove dirt and any small spines. Trim off the ends and peel or scrape away any tough or fibrous outer skin. Cut into bite-sized pieces. For a more tender texture, you can blanch them briefly before sautéing, stir-frying, or simmering.
Storing
Wrap unwashed squash stems in a damp paper towel and place them in a loosely sealed plastic bag or container. Store in the refrigerator's crisper drawer and use within a couple of days for best texture and flavor.
How to use:
Fritters or Patties: Finely chop tender squash stems and mix with grated vegetables, herbs, and a binder like egg and flour. Pan-fry into crispy fritters or savory patties.
Pasta or Noodle Dishes: Sauté chopped squash stems and toss them into pasta dishes, especially ones with light sauces like garlic and olive oil, lemon butter, or tomato-based sauces.
Rice or Grain Bowls: Add cooked squash stems to rice, quinoa, or barley bowls for texture and mild green flavor. They pair well with roasted veggies, beans, and vinaigrettes.
Egg Dishes: Stir chopped, sautéed stems into scrambled eggs, omelets, or frittatas for an earthy green bite.
Pickled: For a tangy twist, lightly pickle blanched squash stems in vinegar, sugar, and spices. This makes a flavorful topping for rice bowls, tacos, or sandwiches.
Juiced: *Suggested by a CSA member* Run peeled stems through a juicer for a refreshing, lightly earthy drink. Optionally, add cucumber, citrus or apple for a bright drink.
Meal Ideas
Veggie Tacos – Fill tortillas with sautéed squash, stems, greens, and a cucumber-turnip slaw.
Chopped Salad – Mix salad greens, cucumbers, turnips, and pea tendrils with a light dressing.
Quick Pickles – Slice turnips and cucumbers and marinate in vinegar, salt, and sugar.
Stir-Fry – Cook squash, stems, and collards quickly with oil and garlic.
Baked Veggie Chips – Roast torn kale and collards with oil and salt until crispy.
Grain Bowl – Pile sautéed greens and squash on rice or another grain with your favorite sauce.
Veggie Patties – Combine chopped greens with cooked grains and egg, then fry into patties.
Fresh Wraps – Roll cucumbers, turnips, and tendrils in rice paper or lettuce leaves.
Egg Bake – Mix cooked squash and greens into eggs and bake until set.