Wow, it’s already June! How did that happen? It’s been quite the spring so far. It started out super cold and wet and instantly turned hot and dry. It was like extended February then august all in a few weeks. We have already had to install our irrigation. That is usually not a thing until almost July.
The heat and dry really took a toll on our cool weather crops. Most of the greens and other stuff we would normally have early in the season have bolted, gone to flower. We planted things like carrots, celery, pok choi, leeks, turnips, and radishes late in the winter for late spring early summer harvest but they all have bolted. Which means they’ve turned their energy to producing seeds. Making most of these crops inedible.
That is farming. You’ll definitely notice the lack for the first few weeks of our CSA. The good news is the early heat and dry has allowed us to plant our summer crops almost a month earlier than usual. We already have our first round of sweet corn up and a second round just planted. The squash and cucumbers are in the field and growing. The hoop house is full of tomatoes with blooms already. The sweet potatoes are going in the ground this week and hopefully by the first or second week of July we should have green beans.
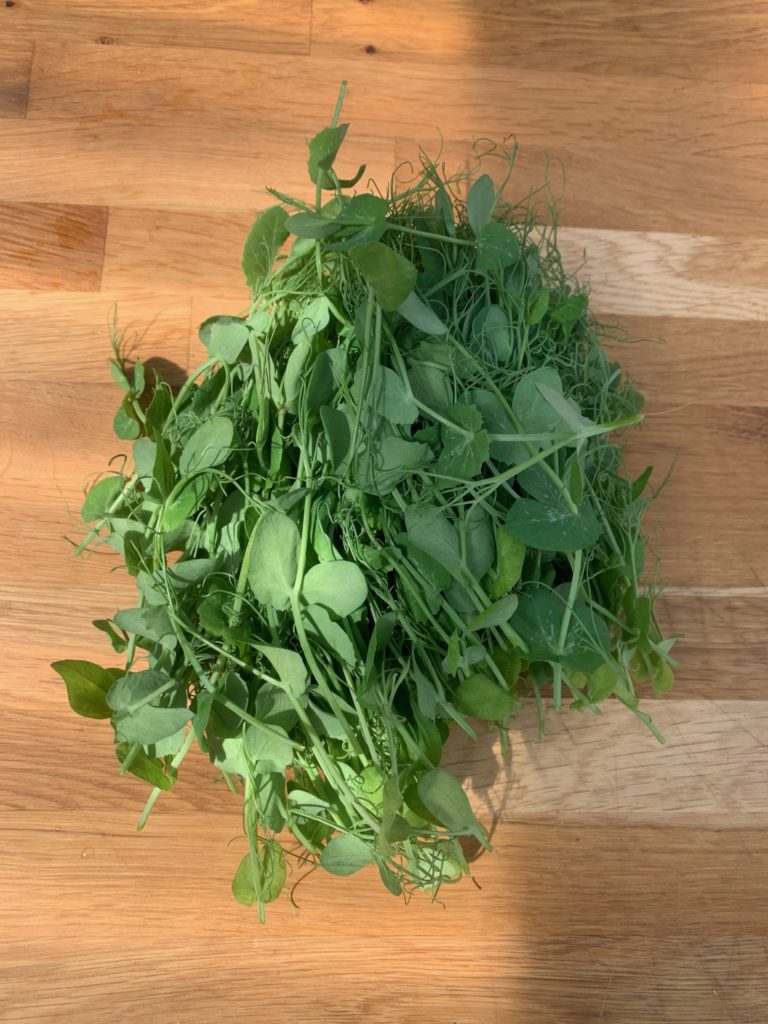
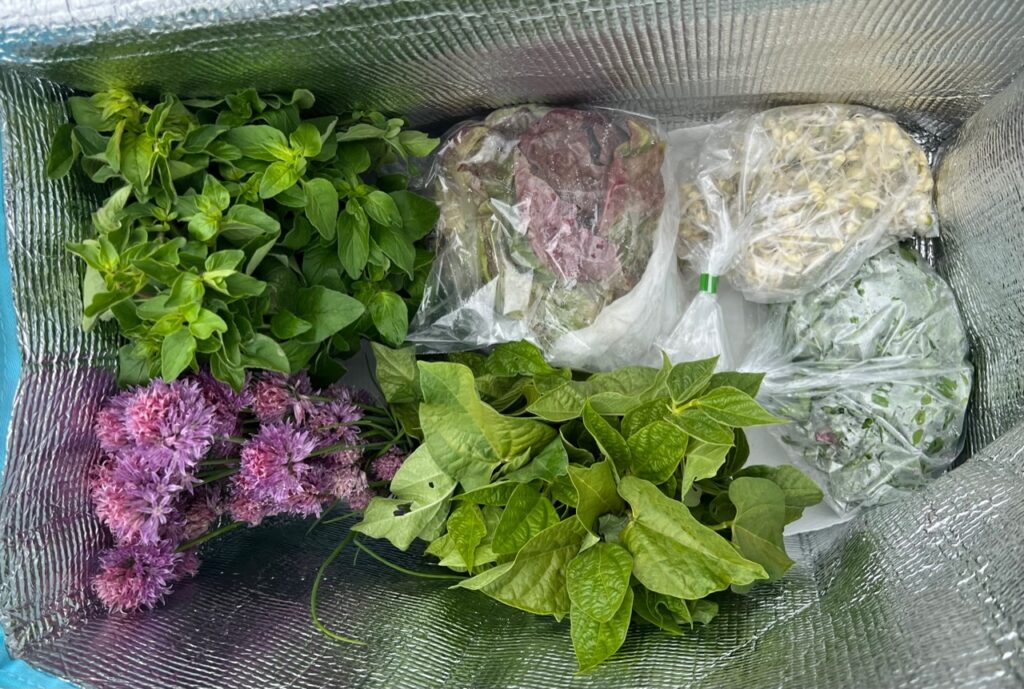
Pea Tendrils
Pea tendrils, also known as pea shoots or pea sprouts, are young and tender tendrils that grow from the tops of pea plants. They are delicate, leafy greens with thin, curly stems and small, bright green leaves. The taste of pea tendrils is often described as mild and slightly sweet, with a subtle hint of the distinct flavor found in mature peas. The texture is tender and crisp, providing a pleasant crunch.
Prep
Rinse. The whole tendril is edible. Sometimes the stems get a little woody at the ends and can be removed. Eat raw or cooked.
Storing
It's best to use it within a few days for optimal flavor. To store it, place unwashed leaves in a perforated plastic bag or a container lined with a dry paper towel to absorb excess moisture. Seal the bag or container loosely to allow for some airflow. Store the bag in the refrigerator's crisper drawer, where it will stay fresh for a few days.
How to use:
Salads: Add pea tendrils to your favorite salad greens for an extra layer of texture and flavor.
Stir-fries: Toss pea tendrils into stir-fries towards the end of cooking. Their tender texture and subtle flavor make them a perfect addition to stir-fried vegetables, meats, or noodles.
Sandwiches and Wraps: Layer pea tendrils in sandwiches or wraps to add a crisp and refreshing bite. They can provide a light and delicate crunch, along with a touch of sweetness.
Soups and Stews: Add pea tendrils to hot soups or stews just before serving. They will wilt slightly, adding a pop of green color and a burst of freshness to the dish.
Pasta Dishes: Mix cooked pea tendrils into pasta dishes like spaghetti or fettuccine. The tendrils will add a delicate and vibrant element to the pasta, complementing the other ingredients.
Pesto or Sauce: Blend pea tendrils with garlic, nuts, cheese, and olive oil to make a flavorful pesto or sauce. Use it as a spread, dip, or toss it with cooked pasta for a quick and vibrant meal.
Side Dish: Sauté pea tendrils with garlic and olive oil for a simple and nutritious side dish. The gentle cooking will help retain their delicate flavor and texture.
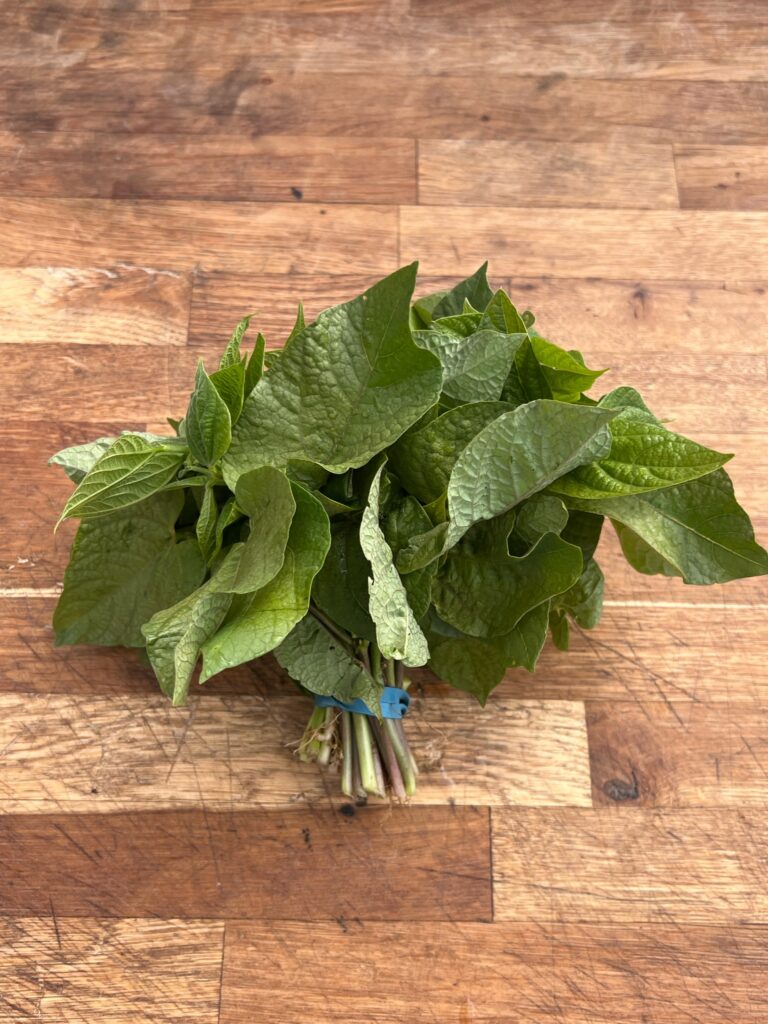
Green bean leaves have a mild and slightly grassy flavor with a hint of nuttiness. The taste is often compared to that of spinach or other leafy greens. The leaves have a tender texture, especially when young, and they can be slightly chewy when cooked. Bean leaves can be consumed raw in salads or used in cooked dishes, such as stir-fries, soups, or stews. They absorb flavors well from other ingredients and seasonings, making them a versatile addition to various culinary preparations.
Prep
Rinse. Remove leaves from stems, chop or add whole leaves. Eat raw or cooked.
Storing
It's best to use it within a few days for optimal flavor. To store it, place unwashed leaves in a perforated plastic bag or a container lined with a dry paper towel to absorb excess moisture. Seal the bag or container loosely to allow for some airflow. Store the bag in the refrigerator's crisper drawer, where it will stay fresh for a few days.
Preserving
Freezing: strip the leaves from the stems, and start by blanching them. Bring a large pot of water to a boil and prepare an ice bath. Submerge the leaves in the boiling water for about 1 minute, then quickly transfer them to the ice bath to cool rapidly. Drain the leaves thoroughly and pat them dry. Arrange the blanched and dried leaves in a single layer on a baking sheet and freeze until firm. Transfer the frozen leaves to airtight freezer bags, removing as much air as possible, and seal. Label the bags with the date and store in the freezer for up to 6 to 8 months. Thaw the frozen leaves in the refrigerator before using them in cooked dishes.
How to use:
Sautéed side dish: Our favorite way! Sauté green bean leaves in olive oil or butter with garlic and seasonings of your choice. Cook until they are wilted and tender. Just garlic and salt is fantastic!
Stir-fries: Sauté green bean leaves with garlic, ginger, and your choice of protein (such as chicken, tofu, or shrimp) in a hot skillet. Add soy sauce or other seasonings for flavor and cook until the leaves are wilted and tender.
Soups and stews: Add green bean leaves to vegetable soups or stews for added nutrition and flavor. They can be added towards the end of cooking, as they cook relatively quickly.
Salad greens: Use green bean leaves as an alternative or addition to traditional salad greens. Combine them with other fresh vegetables, herbs, and a vinaigrette dressing for a refreshing salad.
Wraps and rolls: Use green bean leaves as a wrapper for spring rolls or stuffed rolls. Fill them with a combination of vegetables, protein, and your choice of sauce for a flavorful appetizer or snack. With smaller leaves this might look more like a scooped filling on a leaf. Kinda like cheese on crackers.
Blanched and seasoned: Blanch green bean leaves in boiling water for a minute or two until they turn bright green. Drain and toss them with olive oil, lemon juice, salt, and pepper for a quick and healthy side dish.
Mung bean sprouts are, crisp, and crunchy sprouts that emerge from germinated mung beans. These sprouts are commonly used in various cuisines, particularly in Asian dishes. Mung bean sprouts have a delicate and mild flavor, with a slight nuttiness.
Prep
Rinse. Eat raw or cooked.
Storing
To store it, place unwashed sprouts in a container lined with a dry paper towel to absorb excess moisture. Seal the bag or container loosely to allow for some airflow. Store the bag in the refrigerator's crisper drawer, where it will stay fresh for a few days.
How to use:
Salad: Add mung bean sprouts to your favorite salad recipe for a crunchy texture and a boost of nutrition.
Stir-fry: Stir-fry mung bean sprouts with vegetables like bell peppers, mushrooms, and onions for a quick and easy meal.
Sandwiches and wraps: Use mung bean sprouts as a filling for sandwiches or wraps, along with other vegetables and your favorite protein.
Soups and stews: Add mung bean sprouts to soups and stews for a refreshing crunch. They are delicious in Asian-style soups like miso soup or tom yum soup.
Spring rolls: Use mung bean sprouts as a filling for fresh spring rolls, along with other vegetables and your favorite protein.
Toppings: Use mung bean sprouts as a topping for dishes like ramen, pho, or bibimbap, along with other toppings like scallions, cilantro, and sesame seeds.
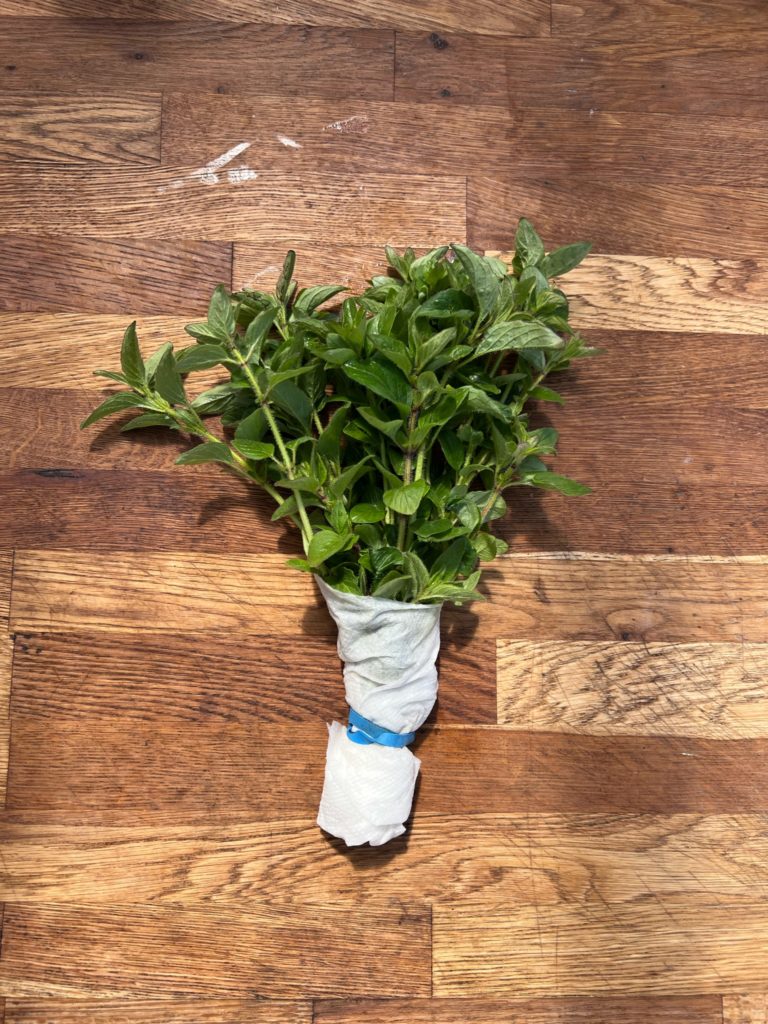
Oregano has a strong and aromatic flavor with warm and slightly bitter undertones. The taste can be described as pungent, earthy, and slightly peppery. The aroma of oregano is also quite distinctive, reminiscent of a mixture of mint, thyme, and woodsy notes. The flavor of oregano pairs well with tomato-based dishes, grilled meats, roasted vegetables, and Mediterranean cuisine in general.
Prep
Rinse. Remove leaves from stems, chop or add whole leaves. Eat raw or cooked.
Storing
It's best to use it within a few days for optimal flavor. To store it, wrap the fresh oregano in a damp paper towel and place it in a plastic bag. Store the bag in the refrigerator's crisper drawer, where it will stay fresh for a few days.
Preserving
Drying: tie small bundles of oregano sprigs together and hang them upside down in a dry, well-ventilated area away from direct sunlight. Once the leaves are completely dry and brittle, remove them from the stems and store them in an airtight container.
Freezing: strip the leaves from the stems, wash and dry them thoroughly, and place them in a freezer bag or an airtight container. Keep the container in the freezer and use as needed. Frozen oregano may lose some of its texture but will retain its flavor.
How to use:
Seasoning for meats: Sprinkle oregano on grilled or roasted meats, such as chicken, lamb, or beef.
Pasta sauces: Add oregano to tomato-based pasta sauces for a savory and aromatic note. It pairs well with tomatoes and garlic.
Pizza topping: Sprinkle oregano over your homemade or store-bought pizza for a classic herbaceous flavor.
Marinades and dressings: Incorporate oregano into marinades for chicken, fish, or vegetables, or use it in homemade salad dressings for an extra layer of flavor.
Roasted vegetables: Toss chopped vegetables, such as potatoes, carrots, or zucchini, with olive oil, salt, pepper, and a sprinkle of oregano before roasting in the oven.
Mediterranean dishes: Oregano is commonly used in Mediterranean cuisine. Use it in Greek or Italian dishes, like Greek salads, tzatziki sauce, or tomato-based sauces for pasta or lasagna.
Herbed butter or oil: Mix finely chopped fresh oregano with softened butter or olive oil, and use it as a spread for bread or as a flavor enhancer for cooked vegetables.
Infused vinegar: Add dried oregano to vinegar, such as red wine vinegar or apple cider vinegar, and let it infuse for a few weeks. Use the infused vinegar in dressings or as a condiment.
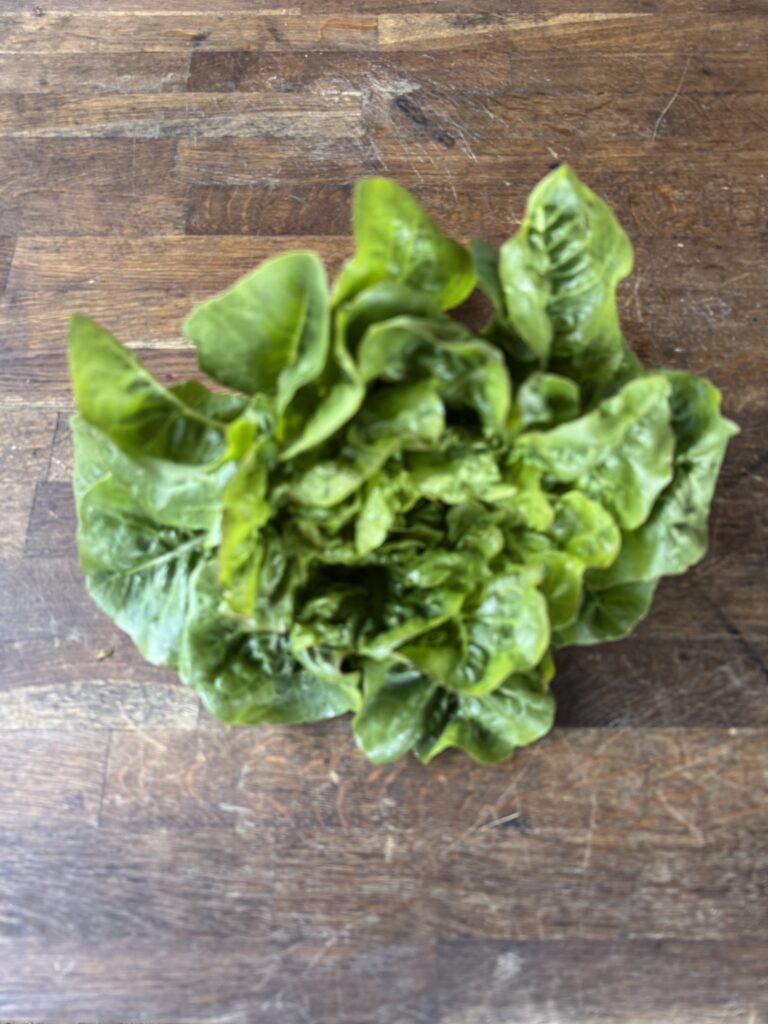
Lettuce, a leafy green vegetable, is known for its mild and refreshing taste. With its crisp texture and delicate flavor, lettuce offers a light and cooling sensation in the mouth. The leaves are often tender and slightly sweet, accompanied by a subtle hint of bitterness that adds depth to its overall taste.
Prep
Rinse. Remove leaves from the base, chop or add whole leaves. Eat raw or cooked. If the lettuce starts to wilt, you can revive it by soaking the leaves in ice water for a few minutes before patting them dry and using as desired.
Storing
It's best to use it within a few days for optimal flavor. To store it, place unwashed leaves in a bag or a container lined with a dry paper towel to absorb excess moisture. Seal the bag or container loosely to allow for some airflow. Store the bag in the refrigerator's crisper drawer, where it will stay fresh for a few days.
Preserving
Freezing: While lettuce doesn't freeze well on its own, you can use the freezing method for preserving lettuce for cooked dishes or for making soups, stews, or smoothies. Blanche or steam the lettuce briefly, then cool it down quickly in ice water and pat dry before freezing in airtight containers or freezer bags.
How to use:
Salads: Lettuce is a staple ingredient in salads. Use it as a base and layer on other vegetables, fruits, proteins, and dressings to create a refreshing salad.
Wraps and Sandwiches: Replace bread or tortillas with large lettuce leaves to create healthy and low-carb wraps or sandwich wraps. Fill them with your favorite fillings such as grilled chicken, turkey, or veggies.
Burgers and Sandwiches: Add a crisp lettuce leaf to your burgers or sandwiches to provide a crunchy and fresh element. It adds texture and helps balance out the flavors.
Lettuce Cups: Use large lettuce leaves as cups to hold flavorful fillings like stir-fried vegetables, seasoned meats, or grains. This makes for a light and refreshing meal or appetizer.
Soups and Stews: Add shredded lettuce to hot soups or stews just before serving. The lettuce will wilt slightly and add a refreshing touch to the warm dish.
Stir-fries: Toss lettuce leaves into stir-fries at the last minute, allowing them to wilt slightly but still maintain some crispness. They add a fresh and vibrant element to the dish.
Smoothies: Yes, you can even add lettuce to your smoothies!
Chive blossoms have a delicate and subtle onion-like flavor. The taste is milder compared to the pungent flavor of chive leaves. The blossoms have a slightly sweet and floral undertone. The blossoms can be used as a garnish or infused into oils, vinegars, or dressings to impart their subtle onion flavor. They are also edible and can be sprinkled over salads, soups, or other dishes for a touch of color and flavor.
Prep
Rinse. The blossoms and the chives themselves are all edible. Chop or add whole. Eat raw or cooked.
Storing
It's best to use it within a few days for optimal flavor. When storing chive blossoms with the chives attached, start by placing them in a jar or glass of water, similar to a bouquet of flowers, with the chives submerged in the water. Loosely cover the jar with a plastic bag or a perforated plastic wrap to create a humid environment while allowing some air circulation. Store the jar in the refrigerator, changing the water every few days to keep it fresh. This method helps maintain the moisture and crispness of the chives and ensures the blossoms stay vibrant and edible for a longer period. Before using, simply snip off the desired amount of chives and blossoms, rinsing them again if needed.
Preserving
You can freeze, dry, infused vinegar or alcohol with chive blossoms. Infusions will keep for a few months in the refrigerator.
Freezing Chives: Finely chop the chives and spread them in a single layer on a baking sheet or plate. Place it in the freezer until the chives are frozen. Transfer the frozen chives to a freezer-safe container or bag and keep them in the freezer. They can be used directly from frozen in soups, stews, and other cooked dishes.
Drying Chives: Bundle the chive stalks together and hang them upside down in a dry, well-ventilated area away from direct sunlight. Once the chives are dry and brittle, store them in an airtight container. Crush or crumble the dried chives when you're ready to use them. Dried chives work well in seasoning blends, herb-infused oils, or homemade spice mixes.
How to use:
Garnish: Use chive blossoms as a colorful and edible garnish for salads, soups, roasted vegetables, or grilled meats.
Infused Oils and Vinegars: Add chive blossoms to a bottle of olive oil or vinegar to infuse them with a delicate onion-like flavor. Allow the blossoms to steep in the liquid for a few weeks, then strain out the flowers and use the infused oil or vinegar in dressings, marinades, or for drizzling over dishes.
Compound Butter: Mix finely chopped chive blossoms into softened butter along with a pinch of salt. Roll the mixture into a log shape using plastic wrap and refrigerate until firm. Slice the flavored butter and use it to top grilled steak, roasted vegetables, or spread it on bread.
Herb Butter or Cream Cheese: Blend chive blossoms with softened butter or cream cheese for a flavored spread. Use it on bagels, sandwiches, or as a dip for crackers and veggies.
Herb-infused Salt: Dry the chive blossoms and combine them with coarse sea salt. Use this chive blossom-infused salt as a seasoning for various dishes, such as salads, grilled meats, or roasted vegetables.
Floral Ice Cubes: Place chive blossoms in ice cube trays, fill with water, and freeze. Add these flower-filled ice cubes to savory drinks like a bloody/virgin Mary.
Infuse alcohol: Rinse blossoms gently under cold water and pat them dry. Place the blossoms in a clean glass jar and pour in your choice of alcohol, such as vodka or gin, making sure the blossoms are fully submerged. Seal the jar tightly and store it in a cool, dark place for a few days up to a weeks. Shake the jar gently every few days to enhance the infusion process. Taste every few days to see if it has infused enough for your liking. After the desired infusion time, strain the liquid through a fine-mesh sieve or cheesecloth to remove the chive blossoms, and transfer the infused alcohol to a bottle for storage.