This Week on the Farm: Summer Growth, New Plantings, and Plenty of Weeds
Summer has arrived and the zucchini are proving it. They’re producing like crazy and growing faster than we can keep up. The cucumbers are mining nicely, but the cooler weather has kept pollinators quiet, so fruit set has been slower than we’d hoped. We’re looking forward to warmer days to help move things along.
The tomatoes have started setting fruit. It’s always exciting to see those first clusters forming. Fun fact: it takes about 60 to 80 days from flower to ripe fruit, and once fruit is set it can take another 20 to 60 days to fully ripen. We’re watching them closely and can’t wait for the first ripe ones.
The weeds are growing better than anything else. We’re deep into weeding season and it’s always a puzzle how they thrive while the radishes refuse to grow.
Here’s what we’ve planted recently
Red, green, Napa, and Savoy cabbage
Okra
Slicing cucumbers
Cantaloupe and Sugar Baby watermelon
About 400 hot and sweet peppers in the hoophouse
Multi-colored Asian eggplants
Celeriac and celery
600 sweet yellow and red onion starts
Thank you for following along with our farm’s progress. We’re working hard to bring you the best of the season and appreciate your support.
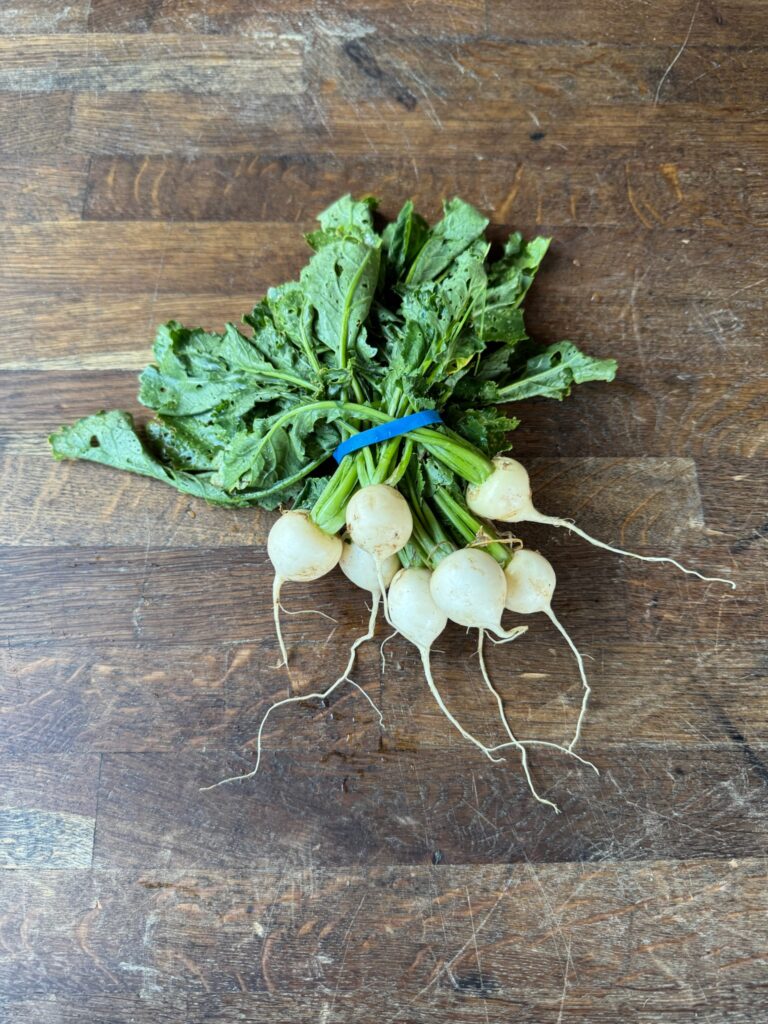
Hakurei Turnips
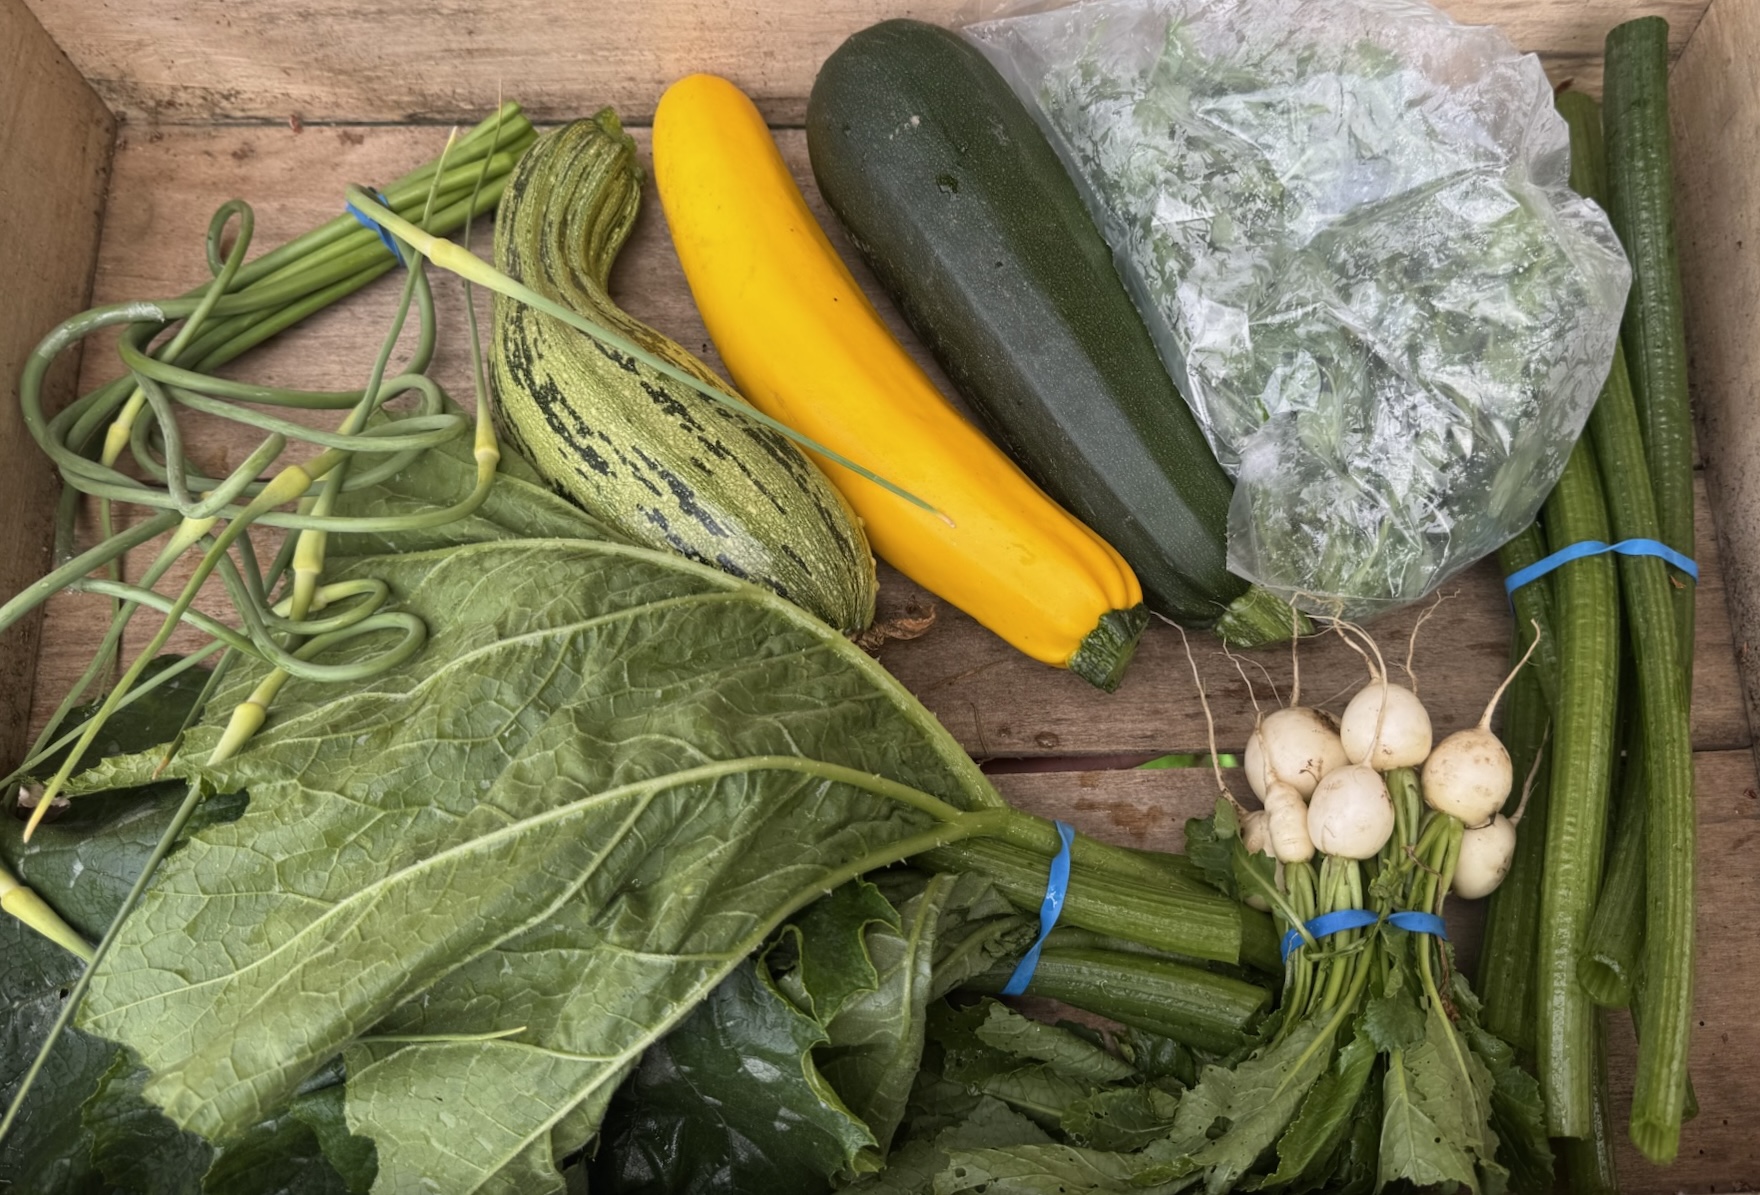
Hakurei turnips, also known as baby salad turnips, are small, smooth, white turnips with tender skin and a sweet, crisp texture. Unlike larger, more pungent turnips, these can be enjoyed raw or cooked, and their mild flavor makes them a favorite in fresh salads, pickles, or lightly sautéed dishes. The leafy green tops are also edible and can be used like other leafy greens in sautés or soups.
Prep
Rinse. The whole turnip is edible, leaves and root. Eat raw or cooked. If the leaves start to wilt, you can revive them by soaking in ice water for a few minutes before patting them dry and using as desired.
Storing
Store the turnips and greens separately.
It's best to use leaves within a few days for optimal flavor. To store it, place unwashed leaves in a perforated plastic bag or a container lined with a dry paper towel to absorb excess moisture. Seal the bag or container loosely to allow for some airflow. Store the bag in the refrigerator's crisper drawer, where it will stay fresh for a few days.
Turnip roots can keep for months in the refrigerator.
Preserving
Freezing: Turnips can be blanched and frozen for long-term storage. Start by cutting the turnips into your desired shape (slices, cubes, or wedges). Blanch them in boiling water for a couple of minutes, then immediately transfer them to an ice bath to stop the cooking process. Drain and pat dry the turnips before packaging them in airtight freezer bags or containers. Label and date the packages, then store them in the freezer for up to 10 to 12 months.
Fermenting: Fermenting turnips creates a tangy and flavorful product. Grate the turnips, then place them in a clean jar. Prepare a brine solution by dissolving salt in water (approximately 2 tablespoons of salt per quart of water). Pour the brine over the grated turnips, ensuring they are completely submerged. Place a weight on top to keep the turnips submerged and cover the jar loosely with a lid. Allow the turnips to ferment at room temperature for a few days to a week, depending on your desired level of fermentation. Taste after a few days. Once fermented, secure the lid tightly and store the jar in the refrigerator.
Pickling: Turnips can be pickled to preserve their crispness and add a tangy flavor. Prepare a pickling brine by combining vinegar, water, salt, sugar, and your choice of spices. Bring the brine to a boil, then let it cool. Peel and slice the turnips, then pack them into sterilized jars. Pour the cooled brine over the turnips, ensuring they are fully submerged. Seal the jars with sterilized lids and store them in the refrigerator. Allow a few days for the flavors to develop before enjoying the pickled turnips.
How to use:
Raw in Salads: Slice or quarter baby salad turnips and toss them into green or grain salads for a sweet, crisp bite.
Pickled: Quick-pickle sliced turnips in vinegar, sugar, and salt for a tangy snack or topping.
Sautéed: Sauté whole or halved turnips in olive oil or butter until golden and tender. Add the greens near the end for a full use of the plant.
Roasted: Roast with other root vegetables for a caramelized, slightly sweet side dish.
Soups and Stir-Fries: Add chopped turnips and greens to soups or stir-fries for a light, earthy flavor and tender texture.
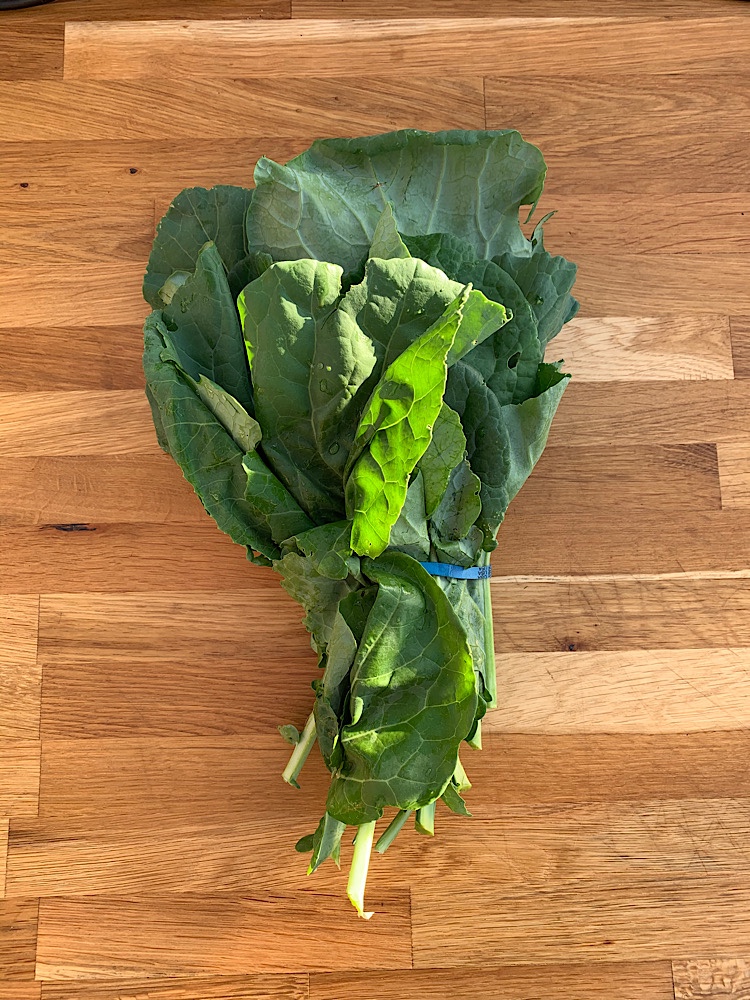
Collards are in the same family as cabbage, broccoli and cauliflower. A bitter green.
Prep
Rinse. Eat raw or cooked. Stems take longer to cook. I like to remove them and cook longer than leaves.
How to use:
Sautéed Collard Greens: Heat a tablespoon of oil in a large skillet over medium heat. Add chopped onions and minced garlic and sauté for a minute. Then add chopped collard greens, a pinch of salt, and some red pepper flakes (optional). Cook until the collard greens are tender, stirring occasionally.
Collard Green Wraps: Use collard greens as a substitute for tortillas or bread in wraps. Fill with your favorite veggies, protein, and sauce for a healthy and flavorful meal.
Collard Green Chips: Preheat the oven to 350°F. Remove the stems from collard greens and tear them into large pieces. Toss the leaves with a little oil and salt. Spread the leaves in a single layer on a baking sheet and bake for 10-15 minutes, or until crispy.
Collard Green Pesto: Combine blanched collard greens, garlic, olive oil, Parmesan cheese, and nuts (such as almonds or pine nuts) in a food processor. Pulse until the mixture forms a smooth paste. Serve with pasta or as a dip.
Collard Green Salad: Thinly slice raw collard greens and toss with a citrus-based dressing, sliced almonds, and dried fruit (such as cranberries or raisins). Add crumbled feta cheese or goat cheese for extra flavor.
Collard Green Soup: Cook chopped onions and garlic in a large pot until softened. Add chopped collard greens, chicken or vegetable broth, and a can of diced tomatoes. Season with salt and pepper to taste. Simmer until the collard greens are tender and the flavors are blended. Serve with crusty bread.
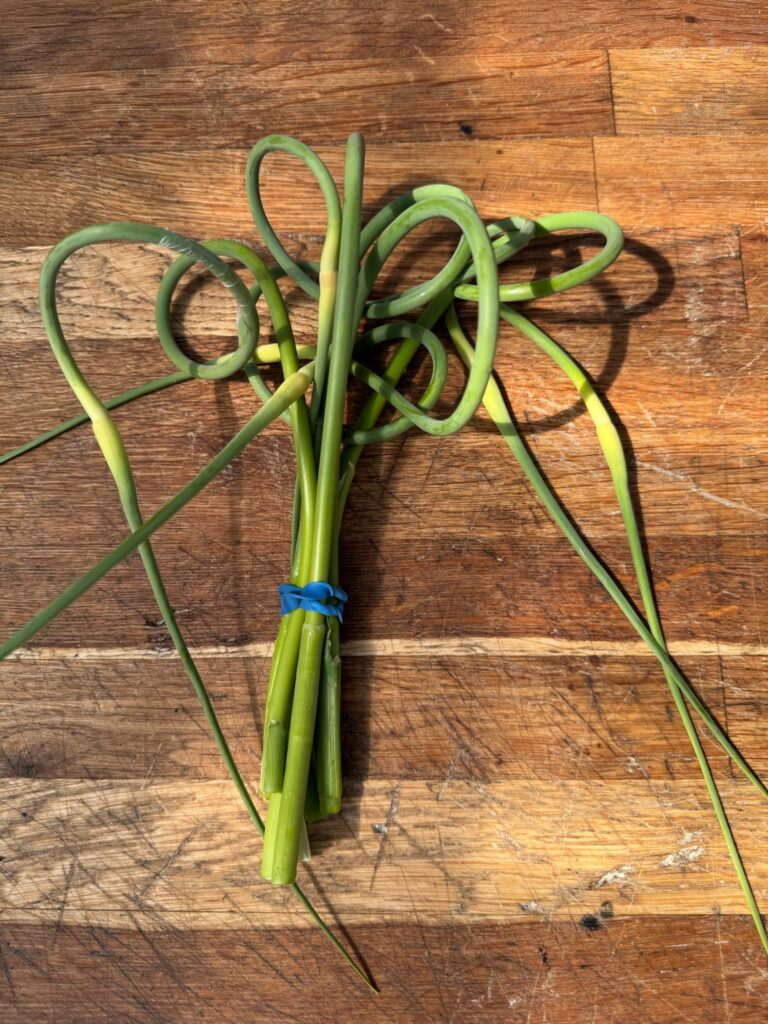
Garlic scapes are the tender, curly green shoots that grow from the hardneck garlic bulb. They have a mild, sweet garlic flavor, making them a versatile ingredient in many dishes. Garlic scapes can be used raw in salads or pestos, sautéed as a side dish, or blended into sauces and dips. Garlic scapes can be used in many of the same ways as scallions, green onions, or asparagus.
Prep
Rinse. Eat raw or cooked.
Storing
In the fridge: Place garlic scapes in a plastic bag or in an airtight container with a damp paper towel. Alternatively, you can store them in a brown paper bag, where they can last for a couple of months. Using a plastic bag can help contain their strong garlic aroma, preventing it from spreading throughout your fridge.
On the counter: Store garlic scapes in a glass of cool water for a few days, making sure to change the water daily to keep them fresh.
How to use:
Pesto: Blend garlic scapes with olive oil, nuts, Parmesan cheese, and a bit of lemon juice to create a fresh and aromatic pesto. This can be used as a sauce for pasta, a spread for sandwiches, or a topping for grilled meats and vegetables.
Stir-Fry: Chop garlic scapes into bite-sized pieces and stir-fry them with other vegetables, meats, or tofu. Their subtle garlic flavor pairs well with soy sauce, ginger, and sesame oil.
Grilled: Toss garlic scapes in olive oil, salt, and pepper, then grill them until they are tender and slightly charred. They make a delicious side dish or can be added to salads and grain bowls.
Roasted: Toss garlic scapes with olive oil, salt, and pepper, then roast them in a hot oven until tender and slightly caramelized. The roasting process enhances their natural sweetness and develops a subtle garlic flavor, making them a flavorful addition to any meal.
Pickled: Preserve garlic scapes by pickling them in a vinegar brine with spices. Pickled scapes are tangy and crisp, perfect for adding to sandwiches, salads, or as a savory snack.
Salads: Thinly slice garlic scapes and add them raw to salads for a mild garlic flavor and a crunchy texture. They complement leafy greens, tomatoes, and cucumbers well.
Soup: Use chopped garlic scapes as a base for soups and broths. They add a gentle garlic essence that enhances the flavor of the soup without overpowering it.
Egg Dishes: Sauté chopped garlic scapes and add them to scrambled eggs, omelets, or frittatas. Their mild flavor pairs wonderfully with eggs and other breakfast ingredients.
Compound Butter: Mix finely chopped garlic scapes into softened butter along with some herbs. This flavorful butter can be used to top steaks, spread on bread, or melt over steamed vegetables.
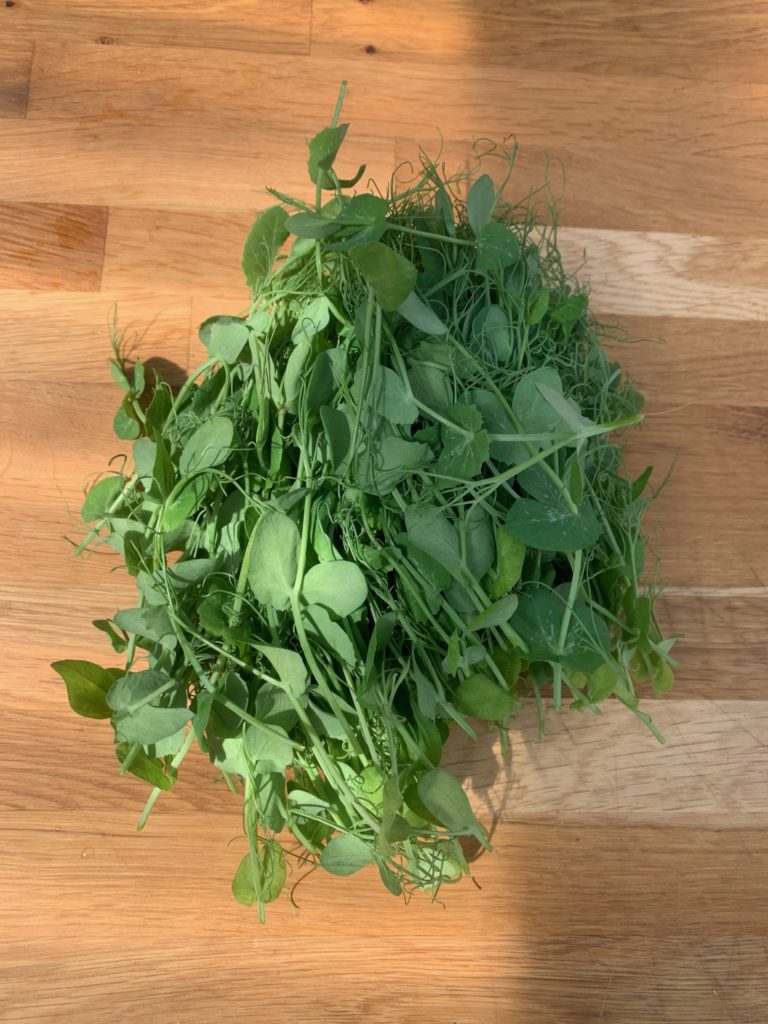
Pea tendrils, also known as pea shoots or pea sprouts, are young and tender tendrils that grow from the tops of pea plants. They are delicate, leafy greens with thin, curly stems and small, bright green leaves. The taste of pea tendrils is often described as mild and slightly sweet, with a subtle hint of the distinct flavor found in mature peas. The texture is tender and crisp, providing a pleasant crunch.
Prep
Rinse. The whole tendril is edible. Sometimes the stems get a little woody at the ends and can be removed. Eat raw or cooked.
Storing
It's best to use it within a few days for optimal flavor. To store it, place unwashed leaves in a perforated plastic bag or a container lined with a dry paper towel to absorb excess moisture. Seal the bag or container loosely to allow for some airflow. Store the bag in the refrigerator's crisper drawer, where it will stay fresh for a few days.
How to use:
Salads: Add pea tendrils to your favorite salad greens for an extra layer of texture and flavor.
Stir-fries: Toss pea tendrils into stir-fries towards the end of cooking. Their tender texture and subtle flavor make them a perfect addition to stir-fried vegetables, meats, or noodles.
Sandwiches and Wraps: Layer pea tendrils in sandwiches or wraps to add a crisp and refreshing bite. They can provide a light and delicate crunch, along with a touch of sweetness.
Soups and Stews: Add pea tendrils to hot soups or stews just before serving. They will wilt slightly, adding a pop of green color and a burst of freshness to the dish.
Pasta Dishes: Mix cooked pea tendrils into pasta dishes like spaghetti or fettuccine. The tendrils will add a delicate and vibrant element to the pasta, complementing the other ingredients.
Pesto or Sauce: Blend pea tendrils with garlic, nuts, cheese, and olive oil to make a flavorful pesto or sauce. Use it as a spread, dip, or toss it with cooked pasta for a quick and vibrant meal.
Side Dish: Sauté pea tendrils with garlic and olive oil for a simple and nutritious side dish. The gentle cooking will help retain their delicate flavor and texture.
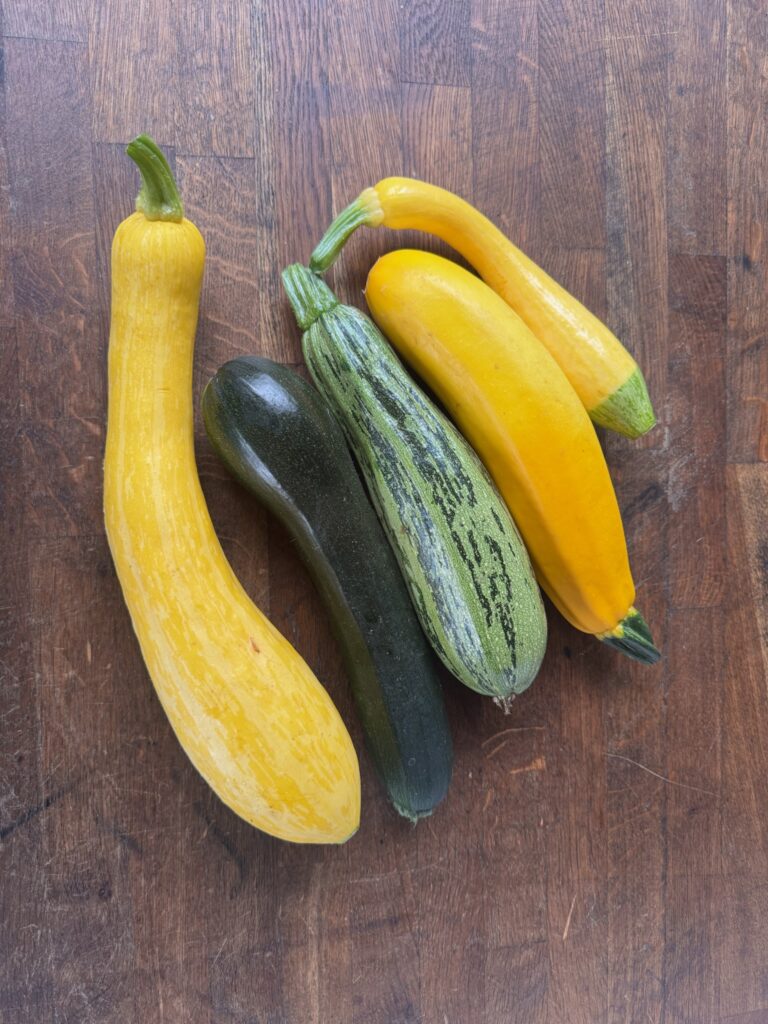
Summer squash refers to a variety of tender, edible gourds that are harvested during the summer months. They typically have a vibrant, yellow or green skin and a mild, slightly sweet flavor. Summer squash comes in various shapes, including elongated, cylindrical zucchini and round or bulbous varieties like pattypan and yellow crookneck squash. The flesh is tender and succulent, with a delicate texture that holds up well in both raw and cooked preparations.
Prep
Rinse. Eat raw or cooked.
Storing
Handle gently. The skin is thin and fragile. Keep on the counter and use within a week. If you aren't going to use them right away keep in the refrigerator.
Preserving
Freezing: Wash and slice the squash into desired shapes, such as rounds or cubes. Blanch the slices in boiling water for a couple of minutes, then quickly transfer them to an ice bath to cool. Drain well and pat dry. Arrange the slices in a single layer on a baking sheet and freeze until firm. Transfer the frozen slices to airtight freezer bags or containers, removing as much air as possible. Label and date the packages, then store them in the freezer for up to 8-10 months.
Dehydrating: Slice the squash into thin rounds or strips. Arrange the slices on dehydrator trays or a baking sheet lined with parchment paper. Set the dehydrator to the appropriate temperature for vegetables or use the oven on its lowest setting. Dry the slices until they are crisp and brittle. Store the dehydrated squash in airtight containers or resealable bags. Rehydrate the slices in water or broth before using them in recipes.
How to use:
Grilling: Slice the squash into thick rounds or lengthwise strips and brush them with olive oil and seasonings. Grill them over medium heat until tender and slightly charred.
Sautéing: Cut the squash into bite-sized pieces or slices and sauté them in a little olive oil or butter until they are golden brown and tender. You can add herbs, garlic, or other seasonings for extra flavor. Sautéed summer squash can be enjoyed as a side dish, added to pasta, or used as a topping for pizzas.
Roasting: Toss sliced summer squash with olive oil, salt, and pepper, then spread them in a single layer on a baking sheet. Roast in a preheated oven at around 425°F (220°C) for 15-20 minutes or until they are tender and caramelized. Roasted summer squash is a tasty addition to grain bowls, salads, or as a side dish.
Raw in salads: Thinly slice or julienne summer squash and add it to salads for a fresh and crisp texture.
Stuffed squash: Hollow out larger summer squash varieties like zucchini or pattypan and fill them with a stuffing of your choice, such as cooked grains, cheese, herbs, or ground meat. Bake until the squash is tender and the filling is cooked through.
Soups and stews: Add sliced or cubed summer squash to soups, stews, or chili for added flavor and texture. It cooks relatively quickly and absorbs the flavors of the other ingredients.
Spiralized: use a spiralizer to make squash noodles. You can simply sauté the squash noodles in a bit of olive oil or butter until they are tender but still retain some crunch. Top them with your favorite pasta sauce, such as marinara, pesto, or alfredo, and garnish with grated cheese, fresh herbs, or toasted nuts. You can also use spiralized summer squash in salads, stir-fries, or cold noodle dishes.
Sauce base: Summer squash can be used to create a delicious and creamy sauce that pairs well with pasta, grains, or roasted vegetables. Start by slicing the summer squash into small cubes or rounds. Steam or sauté until it becomes tender. Transfer the cooked squash to a blender or food processor and blend it until smooth. Add a splash of broth or dairy of choice, a squeeze of lemon juice, and season with salt, pepper, and herbs like basil or thyme to enhance the flavor. You can also incorporate garlic, onion, or Parmesan cheese for additional depth. Adjust the consistency by adding more broth if needed. Toss the sauce with cooked pasta or drizzle it over roasted vegetables.
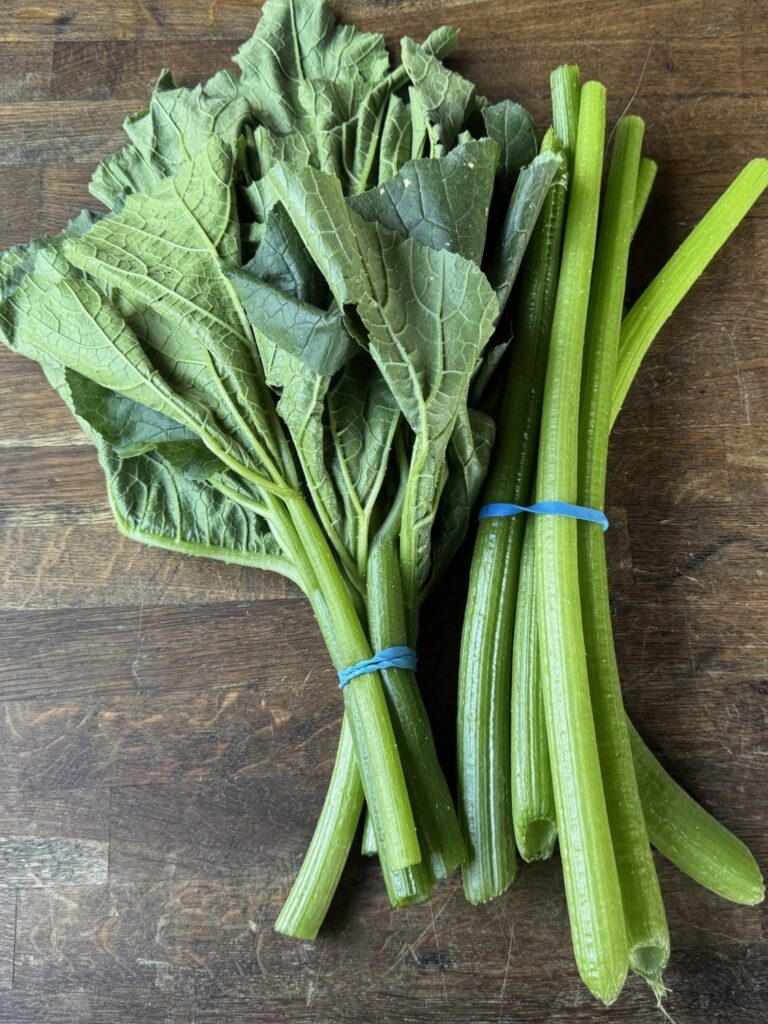
Squash leaves and stems are edible parts of the squash plant often used in traditional cooking across many cultures. The leaves are broad and tender with a mild slightly grassy flavor. The stems are hollow and mildly sweet with a pleasant crunch. Both need to be prepped by removing any tough fibers or spines and are best cooked to soften their texture. They are commonly sautéed stir fried or added to soups and stews. Squash greens pair well with garlic onions and coconut milk and are a great way to use more of the plant during the growing season.
Prep
Rinse squash leaves and stems well to remove dirt and tiny spines. Trim off any tough or woody parts of the stems and peel off any fibrous outer layers if needed. Chop into bite-sized pieces. Blanching briefly in boiling water can help soften them before adding to stir-fries, soups, or stews. Cooking them tames their slightly fuzzy texture and brings out their mild, earthy flavor.
If the leaves start to wilt, you can revive it by soaking the leaves in ice water for a few minutes before patting them dry.
Storing
Gently wrap them in a slightly damp paper towel and place them in a loosely sealed plastic bag or airtight container. Store them in the refrigerator's crisper drawer to help maintain their freshness. It's essential to use them as soon as possible, preferably within a day or two, as they are delicate and can wilt quickly. Avoid washing the blossoms until you're ready to use them, as excess moisture can lead to spoilage. With proper storage, you can preserve the delicate flavor and vibrant appearance of squash blossoms for culinary delights in various dishes.
How to use:
Sautéed Greens: Sauté squash leaves and tender stems with garlic and oil for a quick and flavorful side dish. Add a splash of lemon juice or soy sauce to brighten the flavor.
Soups and Stews: Add chopped squash greens and stems to soups and stews near the end of cooking. They wilt down like spinach and add a mild, earthy taste.
Stir-Fries: Toss squash leaves into stir-fries with other vegetables, noodles, or rice. They cook quickly and absorb sauces well.
Steamed: Steam the leaves and stems lightly and serve with a drizzle of olive oil and a sprinkle of salt. This method preserves their delicate texture.
Curries: Add squash leaves to coconut-based curries for a hearty, nourishing green. They hold up well to bold spices.
Stir-Fry: Sauté chopped garlic scapes, thinly sliced hakurei turnips, and summer squash in olive oil. Add chopped squash stems and leaves and cook until tender. Toss in pea tendrils at the end and season with tamari or coconut aminos.
Raw Salad: Toss shaved summer squash and thinly sliced hakurei turnips with fresh pea tendrils. Dress with lemon juice, olive oil, and a pinch of sea salt for a crisp, refreshing salad.
Soup: Simmer garlic scapes, sliced summer squash, hakurei turnips, and squash stems in vegetable broth. Add squash leaves and pea tendrils last for a bright, green finish.
Wraps: Use tortillas or flatbread and layer with sautéed squash greens and garlic scapes, grilled summer squash, and fresh pea tendrils. Add a smear of hummus or yogurt dressing for flavor.
Sautéed Greens: Sauté squash leaves, stems, and garlic scapes in butter or olive oil with a pinch of salt. Serve as a warm side dish or mix into scrambled eggs.
Veggie Fritters: Grate summer squash and hakurei turnips, then mix with chopped squash stems and garlic scapes. Add an egg and a spoonful of flour to bind. Pan-fry in olive oil until golden and crispy.
Pasta Toss: Sauté garlic scapes, diced summer squash, and chopped squash leaves in olive oil. Toss with pasta, a squeeze of lemon, and fresh pea tendrils. Add grated cheese or nutritional yeast if you like.
Roasted Veggie Plate: Roast hakurei turnips and summer squash in olive oil with garlic scapes until golden. Serve with wilted squash greens and a side of fresh pea tendrils.
Egg Scramble: Sauté chopped garlic scapes and squash stems in butter, then add whisked eggs and stir in finely chopped squash leaves. Serve with fresh sliced turnips and pea tendrils on the side.